This is the multi-page printable view of this section. Click here to print.
AIS XNAT
- 1: Deployment
- 1.1: ALB Ingress Controller
- 1.2: Azure Setup Full
- 1.3: Deploying Istio Service Mesh for our XNAT environment
- 1.4: Using Kustomize as a Post renderer for the AIS XNAT Helm Chart
- 1.5: Linode setup
- 1.6:
- 1.7: XNAT Quick Start Guide
- 2: Development
- 2.1: Continuous Integration / Continuous Delivery
- 2.2: Development workstation with Multipass on MacOS
- 2.3: NixOS: Minikube
- 2.4: Ubuntu: microk8s
- 2.5: Windows 10: Multipass
- 2.6: XNAT chart README
- 2.7: References
- 2.8:
- 3: Operations
1 - Deployment
1.1 - ALB Ingress Controller
Creating an Application Load Balancer to connect to the AIS Helm chart XNAT Implementation
We will be following this AWS Guide:
https://docs.aws.amazon.com/eks/latest/userguide/alb-ingress.html
Before we begin
One thing that you need to know when we want to create new ALB from EKS is service spec type can only support LoadBalancer and NodePort. It won’t supportClusterIP.The Charts Repo has the service defined as ClusterIP so some changes need to be made to make this work. We will get to that later after we have created the ALB and policies.
In this document we create a Cluster called xnat in ap-southeast-2. Please update these details for your environment.
Create an IAM OIDC provider and associate with cluster:
eksctl utils associate-iam-oidc-provider --region ap-southeast-2 --cluster xnat --approve
Download the IAM Policy:
curl -o iam-policy.json https://raw.githubusercontent.com/kubernetes-sigs/aws-load-balancer-controller/main/docs/install/iam_policy.json
Create the IAM policy and take a note of the ARN:
aws iam create-policy --policy-name AWSLoadBalancerControllerIAMPolicy --policy-document file://iam-policy.json
Create the service account using ARN from the previous command (substitute your ARN for the XXX):
eksctl create iamserviceaccount --cluster=xnat --namespace=kube-system --name=aws-load-balancer-controller --attach-policy-arn=arn:aws:iam::XXXXXXXXX:policy/AWSLoadBalancerControllerIAMPolicy --override-existing-serviceaccounts --approve
Install TargetGroupBinding:
kubectl apply -k "github.com/aws/eks-charts/stable/aws-load-balancer-controller//crds?ref=master"
Download the EKS Helm Chart and update repo information:
helm repo add eks https://aws.github.io/eks-charts
helm repo update
Install the AWS Load Balancer Controller:
helm upgrade -i aws-load-balancer-controller eks/aws-load-balancer-controller --set clusterName=xnat --set serviceAccount.create=false --set serviceAccount.name=aws-load-balancer-controller -n kube-system
Confirm it is installed:
kubectl get deployment -n kube-system aws-load-balancer-controller
You should see - READY 1/1 if it is installed properly
In order to apply this to the XNAT Charts Helm template update the charts/xnat/values.yaml file to remove the Nginx ingress parts and add the ALB ingress parts.
Added to values file:
      kubernetes.io/ingress.class: alb
      alb.ingress.kubernetes.io/scheme: internet-facing
      alb.ingress.kubernetes.io/group.name: xnat
      alb.ingress.kubernetes.io/target-type: ip
For more ALB annotations / options, please see article at the bottom of the page.
Commented out / removed:
      kubernetes.io/ingress.class: "nginx"
      kubernetes.io/tls-acme: "true"
      nginx.ingress.kubernetes.io/whitelist-source-range: "130.95.0.0/16 127.0.0.0/8"
      nginx.ingress.kubernetes.io/proxy-connect-timeout: "150"
      nginx.ingress.kubernetes.io/proxy-send-timeout: "100"
      nginx.ingress.kubernetes.io/proxy-read-timeout: "100"
      nginx.ingress.kubernetes.io/proxy-buffers-number: "4"
      nginx.ingress.kubernetes.io/proxy-buffer-size: "32k"
As pointed out ClusterIP as service type does not work with ALB. So you will have to make some further changes to charts/xnat/charts/xnat-web/values.yaml:
Change:
service:
  type: ClusterIP
  port: 80
to:
service:
  type: NodePort
  port: 80
In xnat/charts/xnat-web/templates/service.yaml remove the line:
clusterIP: None
Then create the Helm chart with the usual command (after building dependencies - just follow README.md). If you are updating an existing xnat installation it will fail so you will need to create a new application.
helm upgrade xnat . -nxnat
It should now create a Target Group and Application Load Balancer in AWS EC2 Services. I had to make a further change to get this to work.
On the Target Group I had to change health check code from 200 to 302 to get a healthy instance because it redirects.
You can fix this by adding the following line to values file:
      # Specify Health Checks
      alb.ingress.kubernetes.io/healthcheck-path: "/"
      alb.ingress.kubernetes.io/success-codes: "302"
Troubleshooting and make sure ALB is created:
watch kubectl -n kube-system get all
Find out controller name in pod. In this case - pod/aws-load-balancer-controller-98f66dcb8-zkz8k
Make sure all are up.
Check logs:
kubectl logs -n kube-system aws-load-balancer-controller-98f66dcb8-zkz8k
When updating ALB is often doesn’t update properly so you will need to delete and recreate the ALB:
kubectl delete deployment -n kube-system aws-load-balancer-controller
helm upgrade -i aws-load-balancer-controller eks/aws-load-balancer-controller --set clusterName=xnat --set serviceAccount.create=false --set serviceAccount.name=aws-load-balancer-controller -n kube-system
Change the stickiness of the Load Balancer:
It is important to set a stickiness time on the load balancer or you can get an issue where the Database thinks you have logged in but the pod you connect to knows you haven’t so you can’t login. Setting stickiness reasonably high – say 30 minutes, can get round this.
alb.ingress.kubernetes.io/target-group-attributes: stickiness.enabled=true,stickiness.lb_cookie.duration_seconds=1800
Change the Load Balancing Algorithm:
alb.ingress.kubernetes.io/target-group-attributes: load_balancing.algorithm.type=least_outstanding_requests
Increase the timeout to 5 minutes from 1. When using the Compressed Image Uploader you can sometimes get a 504 Gateway timeout error message. This will fix that issue.
You can read more about it here:
https://aws.amazon.com/premiumsupport/knowledge-center/eks-http-504-errors/
alb.ingress.kubernetes.io/load-balancer-attributes: "idle_timeout.timeout_seconds=300"
Add SSL encryption to your Application Load Balancer
Firstly, you need to add an SSL certificate to your ALB annotations. Kubernetes has a built in module: Cert Manager, to deal with cross clouds / infrastructure.
https://cert-manager.io/docs/installation/kubernetes/
However, in this case, AWS has a built in Certificate Manager that creates and a renews SSL certificates for free so we will be using this technology.
You can read more about it here:
This assumes you have a valid certificate created through AWS Certificate Manager and you know the ARN.
These are additional annotations to add to values file and explanations above:
Listen on port 80 and 443:
alb.ingress.kubernetes.io/listen-ports: '[{"HTTP": 80}, {"HTTPS":443}]'
Specify the ARN of your SSL certificate from AWS Certificate Manager (change for your actual ARN):
alb.ingress.kubernetes.io/certificate-arn: "arn:aws:acm:XXXXXXX:certificate/XXXXXX"
Specify AWS SSL Policy:
alb.ingress.kubernetes.io/ssl-policy: "ELBSecurityPolicy-TLS-1-2-Ext-2018-06"
For more details see here of SSL policy options:
https://docs.aws.amazon.com/elasticloadbalancing/latest/application/create-https-listener.html
Finally, for this to successfully work you need to change the host path to allow any path or the Tomcat URL will be sent to a 404 by the Load Balancer. Put a wildcard in the paths to allow any eventual URL (starting with xnat.example.com in this case):
    hosts:
      - host: xnat.example.com
        paths: [ "/*" ]
Redirect HTTP to HTTPS:
This does not work on Kubernetes 1.19 or above as the “use-annotation” command does not work. There is seemingly no documentation on the required annotations to make this work.
Add the following annotation to your values file below the ports to listen on (see above):
alb.ingress.kubernetes.io/actions.ssl-redirect: '{"Type": "redirect", "RedirectConfig": {"Protocol": "HTTPS", "Port": "443", "StatusCode": "HTTP_301"}}'
You must then update the Rules section of ingress.yaml found within the releases/xnat/charts/xnat-web/templates directory to look like this when using Ingress apiVersion of networking.k8s.io/v1beta1 on Kuberbetes version prior to v1.22:
  rules:
    {{- range .Values.ingress.hosts }}
    - host: {{ .host | quote }}
      http:
        paths:
          {{- range .paths }}
          - path: {{ .path }}
            backend:
              serviceName: {{ $fullName }}
              servicePort: {{ $svcPort }}
          {{- end }}
    {{- end }}
For Ingress apiVersion of networking.k8s.io/v1 on Kubernetes version >= v1.22:
  rules:
    {{- range .Values.ingress.hosts }}
    - host: {{ .host | quote }}
      http:
        paths:
          {{- range .paths }}
            backend:
              service:
                name: {{ $fullName }}
                port:
                  number: {{ $svcPort }}
          {{- end }}
    {{- end }}
This will redirect HTTP to HTTPS on Kubernetes 1.18 and below.
Full values.yaml file ingress section:
  ingress:
    enabled: true
    annotations:
      kubernetes.io/ingress.class: alb
      alb.ingress.kubernetes.io/scheme: internet-facing
      alb.ingress.kubernetes.io/target-type: ip
      alb.ingress.kubernetes.io/listen-ports: '[{"HTTP": 80}, {"HTTPS":443}]'
      alb.ingress.kubernetes.io/actions.ssl-redirect: '{"Type": "redirect", "RedirectConfig": {"Protocol": "HTTPS", "Port": "443", "StatusCode": "HTTP_301"}}'
      alb.ingress.kubernetes.io/healthcheck-path: "/"
      alb.ingress.kubernetes.io/success-codes: "302"
      alb.ingress.kubernetes.io/certificate-arn: "arn:aws:acm:XXXXXXX:certificate/XXXXXX"
      alb.ingress.kubernetes.io/ssl-policy: "ELBSecurityPolicy-TLS-1-2-Ext-2018-06"
      alb.ingress.kubernetes.io/target-group-attributes: "stickiness.enabled=true,stickiness.lb_cookie.duration_seconds=1800,load_balancing.algorithm.type=least_outstanding_requests"
      alb.ingress.kubernetes.io/load-balancer-attributes: "idle_timeout.timeout_seconds=300"
Further Reading:
Troubleshooting EKS Load Balancers:
- https://aws.amazon.com/premiumsupport/knowledge-center/eks-load-balancers-troubleshooting/
- https://medium.com/@ManagedKube/kubernetes-troubleshooting-ingress-and-services-traffic-flows-547ea867b120
ALB annotations:
1.2 - Azure Setup Full
Create an AKS Cluster
One of the great things about Azure is the Azure Cli. Specify Bash and then you can run all commands through your web browser and all tools and kubectl / az commands are already installed and available without having to create them on your workstation or spin up a VM instance for the sole purpose of controlling the cluster.
You can do this via the console if you want. By Azure cli, see below. Create a resource group first.
Specify your Resource Group, cluster name (in our case xnat but please update if your Cluster is name differently), node count and VM instance size:
az aks create \
  --resource-group <Resource Group Name> \
  --name xnat \
  --node-count 3 \
  --generate-ssh-keys \
  --node-vm-size Standard_B2s \
  --enable-managed-identity
Get AZ AKS credentials to run kubectl commands against your Cluster
az aks get-credentials --name xnat --resource-group <Resource Group Name>
Confirm everything is setup correctly:
kubectl get nodes -o wide
kubectl cluster-info
Download and install AIS Chart
git clone https://github.com/Australian-Imaging-Service/charts.git
Add the AIS repo and update Helm:
helm repo add ais https://australian-imaging-service.github.io/charts
helm repo update
Change to the correct directory and update dependencies. This will download and install the Postgresql Helm Chart. You don’t need to do this if you want to connect to an external Postgresql DB.
cd ~/charts/releases/xnat
helm dependency update
Create the namespace and install the chart, then watch it be created.
kubectl create namespace xnat
helm upgrade xnat ais/xnat --install -nxnat
watch kubectl -nxnat get all
It will complain that the Postgresql password is empty and needs updating. Create an override values file (in this case values-aks.yaml but feel free to call it what you wish) and add the following inserting your own desired values:
xnat-web:
  postgresql:
    postgresqlDatabase: <your database>
    postgresqlUsername: <your username>
    postgresqlPassword: <your password>
Update volume / persistence information
It turns out that there is an issue with Storage classes that means that the volumes are not created automatically. We need to make a small change to the storageClass configuration for the ReadWriteOnce volumes and create new external volumes for the ReadWriteMany ones.
Firstly, we create our own Azure files volumes for archive and prearchive and make a slight adjustment to the values configuration and apply as an override.
Follow this document for the details of how to do that:
https://docs.microsoft.com/en-us/azure/aks/azure-files-volume
Firstly, export some values that will be used to create the Azure files volumes. Please substitute the details of your environment here.
AKS_PERS_STORAGE_ACCOUNT_NAME=<your storage account name>
AKS_PERS_RESOURCE_GROUP=<your resource group>
AKS_PERS_LOCATION=<your region>
AKS_PERS_SHARE_NAME=xnat-xnat-web-archive
xnat-xnat-web-archive will need to be used or the Helm chart won’t be able to find the mount.
Create a Resource Group:
az group create --name $AKS_PERS_RESOURCE_GROUP --location $AKS_PERS_LOCATION
Create a storage account:
az storage account create -n $AKS_PERS_STORAGE_ACCOUNT_NAME -g $AKS_PERS_RESOURCE_GROUP -l $AKS_PERS_LOCATION --sku Standard_LRS
Export the connection string as an environment variable, this is used when creating the Azure file share:
export AZURE_STORAGE_CONNECTION_STRING=$(az storage account show-connection-string -n $AKS_PERS_STORAGE_ACCOUNT_NAME -g $AKS_PERS_RESOURCE_GROUP -o tsv)
Create the file share:
az storage share create -n $AKS_PERS_SHARE_NAME --connection-string $AZURE_STORAGE_CONNECTION_STRING
Get storage account key:
STORAGE_KEY=$(az storage account keys list --resource-group $AKS_PERS_RESOURCE_GROUP --account-name $AKS_PERS_STORAGE_ACCOUNT_NAME --query "[0].value" -o tsv)
Echo storage account name and key:
echo Storage account name: $AKS_PERS_STORAGE_ACCOUNT_NAME
echo Storage account key: $STORAGE_KEY
Make a note of the Storage account name and key as you will need them.
Now repeat this process but update the Share name to xnat-xnat-web-prearchive and then again with xnat-xnat-web-build. Run this first and then repeat the rest of the commands:
AKS_PERS_SHARE_NAME=xnat-xnat-web-prearchive
and then update Share name and repeat the process again:
AKS_PERS_SHARE_NAME=xnat-xnat-web-build
Create a Kubernetes Secret
In order to mount the volumes, you need to create a secret. As we have created our Helm chart in the xnat namespace, we need to make sure that is added into the following command (not in the original Microsoft guide):
kubectl -nxnat create secret generic azure-secret --from-literal=azurestorageaccountname=$AKS_PERS_STORAGE_ACCOUNT_NAME --from-literal=azurestorageaccountkey=$STORAGE_KEY
Create Kubernetes Volumes
Now we need to create three persistent volumes outside of the Helm Chart which the Chart can mount - hence requiring the exact name.
Create a file
pv.yaml
apiVersion: v1
kind: PersistentVolume
metadata:
  name: xnat-xnat-web-archive
spec:
  capacity:
    storage: 10Gi
  accessModes:
    - ReadWriteMany
  claimRef:
    name: xnat-xnat-web-archive
    namespace: xnat
  azureFile:
    secretName: azure-secret
    shareName: xnat-xnat-web-archive
    readOnly: false
  mountOptions:
  - dir_mode=0755
  - file_mode=0755
  - uid=1000
  - gid=1000
  - mfsymlinks
  - nobrl
---
apiVersion: v1
kind: PersistentVolume
metadata:
  name: xnat-xnat-web-prearchive
spec:
  capacity:
    storage: 10Gi
  accessModes:
    - ReadWriteMany
  claimRef:
    name: xnat-xnat-web-prearchive
    namespace: xnat
  azureFile:
    secretName: azure-secret
    shareName: xnat-xnat-web-prearchive
    readOnly: false
  mountOptions:
  - dir_mode=0755
  - file_mode=0755
  - uid=1000
  - gid=1000
  - mfsymlinks
  - nobrl
---
apiVersion: v1
kind: PersistentVolume
metadata:
  name: xnat-xnat-web-build
spec:
  capacity:
    storage: 10Gi
  accessModes:
    - ReadWriteMany
  claimRef:
    name: xnat-xnat-web-build
    namespace: xnat
  azureFile:
    secretName: azure-secret
    shareName: xnat-xnat-web-build
    readOnly: false
  mountOptions:
  - dir_mode=0755
  - file_mode=0755
  - uid=1000
  - gid=1000
  - mfsymlinks
  - nobrl
Size doesn’t really matter as like EFS, Azure files is completely scaleable. Just make sure it is the same as your values file for those volumes.
Apply the volumes
kubectl apply -f pv.yaml
We should now have two newly created volumes our Helm chart can mount.
Update our override values file for our Helm chart.
Edit your values-aks.yaml file from above and add the following in (postgresql entries already added):
Paste the following:
xnat-web:
  persistence:
    cache:
      accessMode: ReadWriteOnce
      mountPath: /data/xnat/cache
      storageClassName: ""
      size: 10Gi
      size: 0
  volumes:
    archive:
      accessMode: ReadWriteMany
      mountPath: /data/xnat/archive
      storageClassName: ""
      size: 10Gi
    prearchive:
      accessMode: ReadWriteMany
      mountPath: /data/xnat/prearchive
      storageClassName: ""
      size: 10Gi
    build:
      accessMode: ReadWriteMany
      mountPath: /data/xnat/build
      storageClassName: ""
      size: 10Gi
  postgresql:
    postgresqlDatabase: <your database>
    postgresqlUsername: <your username>
    postgresqlPassword: <your password>
You can now apply the helm chart with your override and all the volumes will mount.
helm upgrade xnat ais/xnat -i -f values-aks.yaml -nxnat
Congratulations! Your should now have a working XNAT environment with properly mounted volumes.
You can check everything is working:
kubectl -nxnat get ev
kubectl -nxnat get all
kubectl -nxnat get pvc,pv
Check that the XNAT service comes up:
kubectl -nxnat logs xnat-xnat-web-0 -f
Create a static public IP, an ingress controller, LetsEncrypt certificates and point it to our Helm chart
OK so all good so far but we can’t actually access our XNAT environment from outside of our cluster so we need to create an Ingress Controller.
You can follow the URL here from Microsoft for more detailed information:
https://docs.microsoft.com/en-us/azure/aks/ingress-static-ip
First, find out the resource name of the AKS Cluster:
az aks show --resource-group <your resource group> --name <your cluster name> --query nodeResourceGroup -o tsv
This will create the output for your next command.
az network public-ip create --resource-group <output from previous command> --name <a name for your public IP> --sku Standard --allocation-method static --query publicIp.ipAddress -o tsv
Point your FQDN to the public IP address you created
For the Letsencrypt certificate issuer to work it needs to be based on a working FQDN (fully qualified domain name), so in whatever DNS manager you use, create a new A record and point your xnat FQDN (xnat.example.com for example) to the IP address you just created.
Add the ingress-nginx repo:
helm repo add ingress-nginx https://kubernetes.github.io/ingress-nginx
Now create the ingress controller with a DNS Label (doesn’t need to be FQDN here) and the IP created in the last command:
helm install nginx-ingress ingress-nginx/ingress-nginx --namespace xnat --set controller.replicaCount=2 --set controller.nodeSelector."beta\.kubernetes\.io/os"=linux --set defaultBackend.nodeSelector."beta\.kubernetes\.io/os"=linux --set controller.admissionWebhooks.patch.nodeSelector."beta\.kubernetes\.io/os"=linux --set controller.service.loadBalancerIP="1.2.3.4" --set controller.service.annotations."service\.beta\.kubernetes\.io/azure-dns-label-name"="xnat-aks"
Please ensure to update the details above to suit your environment - including namespace.
Install Cert-Manager and attach to the Helm chart and Ingress Controller
kubectl label namespace xnat cert-manager.io/disable-validation=true
helm repo add jetstack https://charts.jetstack.io
helm repo update
helm install   cert-manager   --namespace xnat   --version v1.3.1   --set installCRDs=true   --set nodeSelector."beta\.kubernetes\.io/os"=linux   jetstack/cert-manager
You can find a write up of these commands and what they do in the Microsoft article.
Create a cluster-issuer.yaml to issue the Letsencrypt certificates
apiVersion: cert-manager.io/v1alpha2
kind: ClusterIssuer
metadata:
  name: letsencrypt-prod
spec:
  acme:
    server: https://acme-v02.api.letsencrypt.org/directory
    email: your@emailaddress.com
    privateKeySecretRef:
      name: letsencrypt-prod
    solvers:
    - http01:
        ingress:
          class: nginx
          podTemplate:
            spec:
              nodeSelector:
                "kubernetes.io/os": linux
In our case, we want production Letsencrypt certificates hence letsencrypt-prod (mentioned twice here and in values-aks.yaml). If you are doing testing you can use letsencrypt-staging. See Microsoft article for more details.
Please do not forget to use your email address here.
Apply the yaml file:
kubectl apply -f cluster-issuer.yaml -nxnat
NB. To allow large uploads via the Compressed uploader tool you need to specify a value in the Nginx annotations or you get an “413 Request Entity Too Large” error. This needs to go in annotations:
nginx.ingress.kubernetes.io/proxy-body-size: 1024m
This is included in the example below.
Update your override values file to point to your ingress controller and Letsencrypt Cluster issuer
Add the following to your values-aks.yaml file (I have added the volume and postgresql details as well for the complete values file):
xnat-web:
  ingress:
    enabled: true
    annotations:
      kubernetes.io/ingress.class: nginx
      cert-manager.io/cluster-issuer: letsencrypt-prod
      nginx.ingress.kubernetes.io/proxy-body-size: 1024m
    tls:
      - hosts:
          - "yourxnat.example.com"
        secretName: tls-secret
    hosts:
      - "yourxnat.example.com"
    rules:
      - host: "yourxnat.example.com"
        http:
          paths:
            - path: "/"
              backend:
                serviceName: "xnat-xnat-web"
                servicePort: 80
  persistence:
    cache:
      accessMode: ReadWriteOnce
      mountPath: /data/xnat/cache
      storageClassName: ""
      size: 10Gi
  volumes:
    archive:
      accessMode: ReadWriteMany
      mountPath: /data/xnat/archive
      storageClassName: ""
      size: 10Gi
    prearchive:
      accessMode: ReadWriteMany
      mountPath: /data/xnat/prearchive
      storageClassName: ""
      size: 10Gi
    build:
      accessMode: ReadWriteMany
      mountPath: /data/xnat/build
      storageClassName: ""
      size: 10Gi
  postgresql:
    postgresqlDatabase: <your database>
    postgresqlUsername: <your username>
    postgresqlPassword: <your password>
Change yourxnat.example.com to whatever you want your XNAT FQDN to be.
If you are using Letsencrypt-staging, update the cert-manager.io annotation accordingly.
Now update your helm chart and you should now have a fully working Azure XNAT installation with HTTPS redirection enabled, working volumes and fully automated certificates with automatic renewal.
helm upgrade xnat ais/xnat -i -f values-aks.yaml -nxnat
1.3 - Deploying Istio Service Mesh for our XNAT environment
What is a Service Mesh?
From this article:
https://www.redhat.com/en/topics/microservices/what-is-a-service-mesh
“A service mesh, like the open source project Istio, is a way to control how different parts of an application share data with one another. Unlike other systems for managing this communication, a service mesh is a dedicated infrastructure layer built right into an app. This visible infrastructure layer can document how well (or not) different parts of an app interact, so it becomes easier to optimize communication and avoid downtime as an app grows.”
OK so a service mesh helps secure our environment and the communication between different namespaces and apps in our cluster (or clusters).
Istio is one of the most popular Service Mesh software providers so we will deploy and configure this for our environment.
OK so let’s get to work.
There are several different ways to install Istio - with the Istioctl Operator, Istioctl, even on Virtual machines, but we will install the Helm version as AIS uses a Helm deployment and it seems nice and neat.
Following this guide to perform the helm install:
https://istio.io/latest/docs/setup/install/helm/
For our installation we won’t be installing the Istio Ingress Gateway or Istio Egress Gateway controller for our AWS environment.
This is because AWS Cluster Autoscaler requires Application Load Balancer type to be IP whereas the Ingress Gateway controller does not work with that target type - only target type: Instance.
This catch 22 forces us to use only istio and istiod to perform the service mesh and keep our existing AWS ALB Ingress controller. The standard install of Istio is to create an Istio Ingress Gateway, point it to a virtual service and then that virtual service points to your actual service.
For more information on how to install and configure the Istio Ingress Gateway please follow this guide:
https://istio.io/latest/docs/tasks/traffic-management/ingress/ingress-control/
Install Istio
Download Latest version of istioctl:
curl -L https://istio.io/downloadIstio | sh -
Copy binary to /usr/local/bin (change to istio install directory first - i.e. istio-1.11.X):
sudo cp bin/istioctl /usr/local/bin/
Confirm it is working:
istioctl version
Create namespace:
kubectl create ns istio-system
Install the Helm repo:
helm repo add istio https://istio-release.storage.googleapis.com/charts
helm repo update
Install Istio base (must be in istio install directory):
helm install istio-base istio/base -n istio-system
Install istiod:
helm install istiod istio/istiod -n istio-system --wait
Now Istio is installed, we need to apply the configuration to our XNAT namespace to add the Istio sidecars - this is how Istio applies the policies.
https://istio.io/latest/docs/reference/config/networking/sidecar/
Label the namespaces you want the Istio sidecars to install into - in our case XNAT:
kubectl label namespace xnat istio-injection=enabled
Confirm it has been successfully applied:
kubectl get ns xnat --show-labels
At this point you may need to redeploy your pods if there are no sidecars present. When Istio is properly deployed, instead of xnat pods saying 1/1 they will say 2/2 - example:
kubectl get -nxnat all
NAME                    READY   STATUS    RESTARTS   AGE
pod/xnat-postgresql-0   2/2     Running   0          160m
pod/xnat-xnat-web-0     2/2     Running   0          160m
Note about Cluster Austoscaler / Horizontal Pod Autoscaler as it applies to Istio
When using Kubernetes Horizontal Pod Autoscaling (HPA) to scale out pods automatically, you need to make adjustments for Istio. After enabling Istio for some deployments HPA wasn’t scaling as expected and in some cases not at all.
It turns out that HPA uses the sum of all CPU requests for a pod when determining using CPU metrics when to scale. By adding a istio-proxy sidecar to a pod we were changing the total amount of CPU & memory requests thereby effectively skewing the scale out point. So for example, if you have HPA configured to scale at 70% targetCPUUtilizationPercentage and your application requests 100m, you are scaling at 70m. When Istio comes into the picture, by default it requests 100m as well. So with istio-proxy injected now your scale out point is 140m ((100m + 100m) * 70% ) , which you may never reach. We have found that istio-proxy consumes about 10m in our environment. Even with an extra 10m being consumed by istio-proxy combined with the previous scale up trigger of 70m on the application container is well short (10m + 70m) of the new target of 140m
We solved this by calculating the correct scale out point and setting targetAverageValue to it.
Referenced from this article:
https://engineering.hellofresh.com/everything-we-learned-running-istio-in-production-part-2-ff4c26844bfb
Apply our Istio Policies
mTLS
We are going to enable Mutual TLS for the entire mesh.
This policy will do that - call it istio-mtls.yaml:
# istio-mtls.yaml
#
apiVersion: security.istio.io/v1beta1
kind: PeerAuthentication
metadata:
  name: default
  namespace: istio-system
spec:
  mtls:
    mode: STRICT
Now apply the policy:
kubectl apply -f istio-mtls.yaml
Check that mTLS is enabled for all namespaces:
kubectl get peerauthentication --all-namespaces
NAMESPACE      NAME      MODE     AGE
default        default   STRICT   16h
istio-system   default   STRICT   28m
xnat           default   STRICT   16h
Now if we try to access our XNAT server we will get 502 Bad Gateway as the XNAT app can’t perform mTLS. Please substitute your XNAT URL below:
curl -X GET https://xnat.example.com
<html>
<head><title>502 Bad Gateway</title></head>
<body>
<center><h1>502 Bad Gateway</h1></center>
</body>
</html>
So next we want to allow traffic on port 8080 going to our xnat-xnat-web app only and apply mTLS for everything else, so amend istio-mtls.yaml:
apiVersion: security.istio.io/v1beta1
kind: PeerAuthentication
metadata:
  name: default
  namespace: istio-system
spec:
  mtls:
      mode: STRICT
---
apiVersion: security.istio.io/v1beta1
kind: PeerAuthentication
metadata:
  name: default
  namespace: xnat
spec:
  selector:
    matchLabels:
      app: xnat-web
  mtls:
    mode: STRICT
  portLevelMtls:
    8080:
      mode: DISABLE
Now apply again:
kubectl apply -f istio-mtls.yaml
If we now run our curl command again:
curl -X GET https://xnat.example.com
It completes successfully.
Authorization Policy
You can also specify what commands we can run on our xnat-xnat-web app with Authorization policies and even specify via source from specific namespaces and even apps. This gives you the ability to completely lock down the environment.
You can for instance allow a certain source POST access whilst another source only has GET and HEAD access.
Let’s create the following Authorization policy to allow all GET, HEAD, PUT, DELETE and OPTIONS commands to our xnat-web app called istio-auth-policy.yaml:
# istio-auth-policy.yaml
#
apiVersion: "security.istio.io/v1beta1"
kind: "AuthorizationPolicy"
metadata:
     name: "xnat-all"
     namespace: xnat
spec:
    selector:
      matchLabels:
           app: xnat-web
   rules:
   - to:
     - operation:
           methods: ["GET", "HEAD", "PUT", "DELETE", "OPTIONS"]
If you wanted to specify a source you would add a from value under rules and source.
Please follow this guide for more details:
https://istio.io/latest/docs/tasks/security/authorization/authz-http/
Before you apply the policy, we need to add a destination rule to allow the traffic out. Create a file called istio-destination.yaml:
# istio-destination.yaml
#
apiVersion: networking.istio.io/v1alpha3
kind: DestinationRule
metadata:
   name: "xnat-xnat-web"
spec:
    host: xnat-xnat-web.xnat.svc.cluster.local
  trafficPolicy:
    tls:
      mode: ISTIO_MUTUAL
    portLevelSettings:
    - port:
        number: 8080
      tls:
        mode: DISABLE
Apply both policies:
kubectl apply -f istio-auth-policy.yaml
kubectl apply -f istio-destination.yaml
Now let’s see it in action.
curl -X GET https://xnat.example.com
This completes fine. Now let’s try wtih a POST command not included in the authorization policy:
curl -X POST https://xnat.example.com
RBAC: access denied
So our policy is working correctly. However, as XNAT relies rather heavily on POST we will add it in to the policy and try again.
Amend the yaml file to this:
apiVersion: "security.istio.io/v1beta1"
kind: "AuthorizationPolicy"
metadata:
     name: "xnat-all"
     namespace: xnat
spec:
    selector:
      matchLabels:
           app: xnat-web
   rules:
   - to:
     - operation:
           methods: ["GET", "POST", "HEAD", "PUT", "DELETE", "OPTIONS"]
Now re-apply the policy:
kubectl apply -f istio-auth-policy.yaml
And curl again:
curl -X POST https://xnat.example.com
This time it works. OK so we have a working Istio service mesh with correctly applied Mutual TLS and Authorization Policies.
This is only a tiny fraction of what Istio can do, so please go to their website for more information. You should try to lock down permissions further than specified above.
Kiali Installation
Kiali is a fantastic visualisation tool for Istio that helps you see at a glance what your namespaces are up to, if they are protected and allows you to add and update Istio configuration policies right through the web GUI.
In combination with Prometheus and Jaeger, it allows to show traffic metrics, tracing and much more.
You can read more about it here:
https://kiali.io/#:~:text=Kiali%20is%20a%20management%20console,part%20of%20your%20production%20environment.
There are several ways of installing it with authentication (which for production workloads is a must). We are going to use the token method and using the AWS Classic Load Balancer to access.
Once you have installed Istio and Istiod, follow this guide to guide to install via helm:
https://kiali.io/docs/installation/installation-guide/example-install/
Install the Operator via Helm and create Namespace:
helm repo add kiali https://kiali.org/helm-charts
helm repo update kiali
helm repo update
helm install --namespace kiali-operator --create-namespace kiali-operator kiali/kiali-operator
Check everything came up properly:
kubectl get -nkiali-operator all
Install Prometheus and Jaeger into Istio-System namespace to show metrics and tracing. From your Istio installation directory (i.e. istio-1.11.X):
kubectl apply -f samples/addons/jaeger.yaml
kubectl apply -f samples/addons/prometheus.yaml
Check they are correctly installed:
kubectl get -nistio-system all
Create Kiali-CR with authentication strategy token and set to service type LoadBalancer to be able to access outside of the cluster:
# kiali_cr.yaml
#
apiVersion: kiali.io/v1alpha1
kind: Kiali
metadata:
  name: kiali
  namespace: istio-system
spec:
  auth:
    strategy: "token"
  deployment:
    service_type: "LoadBalancer"
    view_only_mode: false
  server:
     web_root: "/kiali"
https://kiali.io/docs/configuration/rbac/
Apply the file:
kubectl apply -f kiali_cr.yaml
Watch it complete setup:
kubectl get kiali kiali -n istio-system -o jsonpath='{.status}' | jq
and:
kubectl get -nistio-system all
To find the ELB address, run:
kubectl get -nistio-system svc kiali
In your browser, type in the copied and pasted details - for example:
http://example-elb.ap-southeast-2.elb.amazonaws.com
Then add :20001/kiali to the end:
http://example-elb.ap-southeast-2.elb.amazonaws.com:20001/kiali
It will then ask you for a Token for the service account to be able to login. Find it out with this command and then copy and paste and you now have a fully running kiali installation:
kubectl get secret -n istio-system \
  $(kubectl get sa kiali-service-account -n istio-system -o jsonpath='{.secrets[0].name}') \
  -o jsonpath='{.data.token}' | base64 -d
https://kiali.io/docs/installation/installation-guide/accessing-kiali/
At this point I tried to set the AWS Elastic Load Balancer to use SSL and a proper certificate but after 4 hours of investigation it turns out that Kiali ingress requires "class_name" and AWS ELB doesn’t have one so that doesn’t work. Rather frustratingly I ended up manually updating the LoadBalancer lister details to be SSL over TCP and to specify the SSL Cipher policy and Certificate Manager. You should also point your FQDN to this Load Balancer to work with your custom certificate. No doubt an integration of Nginx and AWS ELB would fix this - Nginx being Kiali’s default ingress method.
Troubleshooting Istio
Use these commands for our XNAT environment to help debugging:
istioctl proxy-status
istioctl x describe pod xnat-xnat-web-0.xnat
istioctl proxy-config listeners xnat-xnat-web-0.xnat
istioctl x authz check xnat-xnat-web-0.xnat
kubectl logs pod/xnat-xnat-web-0 -c istio-proxy -nxnat
kubectl get peerauthentication --all-namespaces
kubectl get destinationrule --all-namespaces
More Articles on Troubleshooting Istio:
https://www.istioworkshop.io/12-debugging/01-istioctl-debug-command/
https://istio.io/latest/docs/ops/common-problems/security-issues/
Further Reading
Istio AuthorizationPolicy testing / config:
https://istiobyexample.dev/authorization/
Istio mTLS status using Kiali:
https://kiali.io/docs/features/security/
Istio Workshop:
https://www.istioworkshop.io
Istio mTLS Example Setup:
https://istio.io/latest/docs/tasks/security/authentication/mtls-migration/
1.4 - Using Kustomize as a Post renderer for the AIS XNAT Helm Chart
Kustomize
Using a Helm Chart is a pretty awesome way to deploy Kubernetes infrastructure in a neatly packaged, release versioned way.
They can be updated from the upstream repo with a single line of code and for any customisations you want to add into the deployment you specify it in a values.yaml file.
Or at least that’s how it should work. As Helm is based on templates, sometimes a value is hardcoded into the template and you can’t change it in the values file.
Your only option would have been to download the git repo that the Helm chart is based on, edit the template file in question and run it locally.
The problem with this approach is that when a new Helm Chart is released, you have to download the chart again and then apply all of your updates.
This becomes cumbersome and negates the advantages of Helm.
Enter Kustomize. Kustomize can work in several ways but in this guide I will show you how to apply Kustomize as a post-renderer to update the template files to fit our environment.
This allows you to continue to use the Helm Charts from the repo AND customise the Helm Chart templates to allow successful deployment.
https://kustomize.io/
Install Kustomize
Kustomize can be run as its own program using the kustomize build command or built into kubectl using kubectl kustomize. We are going to use the kustomize standalone binary.
Go here to install:
https://kubectl.docs.kubernetes.io/installation/kustomize/binaries/
Direct install:
curl -s "https://raw.githubusercontent.com/kubernetes-sigs/kustomize/master/hack/install_kustomize.sh" | bash
This downloads to whatever directory you are in for whatever Operating System you are using. Copy it to /usr/local/bin to use it system wide:
sudo cp kustomize /usr/local/bin
How Kustomize works
When using Kustomize as a post renderer, Kustomize inputs all of the Helm Charts configuration data for a particular Chart in conjunction with the values file you specify with your cluster specific details and then amends the templates and applies them on the fly afterwards. This is why it is called a post renderer.
Let’s break this down.
1. Helm template
In order to extract all of the Helm chart information, you can use the helm template command. In the case of our XNAT/AIS Helm chart, to extract all of this data into a file called all.yaml (can be any filename) you would run this command:
helm template xnat ais/xnat > all.yaml
You now have the complete configuration of your Helm Chart including all template files in one file - all.yaml.
2. kustomization.yaml
The next step is a kustomization.yaml file. This file must be called kustomization.yaml or Kustomize doesn’t work.
You create this and in it you specify your resources (inputs) - in our example, the resource will be all.yaml. The fantastic thing about Kustomize is you can add more resources in as well which combines with the Helm Chart to streamline deployment.
For instance, in my kustomization.yaml file I also specify a pv.yaml as another resource. This has information about creating Persistent Volumes for the XNAT deployment and creates the volumes with the deployment so I don’t have to apply this separately. You can do this for any resources you want to add to your deployment not included in the Helm chart.
Example using all.yaml and pv.yaml in the kustomization.yaml file:
apiVersion: kustomize.config.k8s.io/v1beta1
kind: Kustomization
resources:
- all.yaml
- pv.yaml
The second part of the Kustomization.yaml file is where you specify the files that patch the templates you need to change.
You need to specify Filename and path, name of the original template, type and version. It should be pointed out there are a lot of other ways to use Kustomize - you can read about them in some of the included articles at the end of this guide.
Example:
patches:
- path: service-patch.yaml
  target:
    kind: Service
    name: xnat-xnat-web
    version: v1
In the above example, the file is service-patch.yaml and is in the same directory as kustomization.yaml, the name is xnat-xnat-web, the kind is Service and version is v1.
Now lets look at the original service.yaml file to get a better idea. It is located in charts/releases/xnat/charts/xnat-web/templates/service.yaml:
apiVersion: v1
kind: Service
metadata:
  name: {{ include "xnat-web.fullname" . }}
  labels:
    {{- include "xnat-web.labels" . | nindent 4 }}
spec:
  type: {{ .Values.service.type }}
  #clusterIP: None
  ports:
    - port: {{ .Values.service.port }}
      targetPort: 8080
      protocol: TCP
      name: http
  selector:
    {{- include "xnat-web.selectorLabels" . | nindent 4 }}
  sessionAffinity: "ClientIP"
{{- if .Values.dicom_scp.recievers }}
---
apiVersion: v1
kind: Service
metadata:
  name: {{ include "xnat-web.fullname" . }}-dicom-scp
  labels:
    {{- include "xnat-web.labels" . | nindent 4 }}
  {{- with .Values.dicom_scp.annotations }}
  annotations:
    {{- toYaml . | nindent 4 }}
  {{- end }}
spec:
  type: {{ .Values.dicom_scp.serviceType | quote }}
  ports:
    {{- $serviceType := .Values.dicom_scp.serviceType }}
    {{- range .Values.dicom_scp.recievers }}
    - port: {{ .port }}
      targetPort: {{ .port }}
      {{- if and (eq $serviceType "NodePort") .nodePort }}
      nodePort: {{ .nodePort }}
      {{- end }}
      {{- if and (eq $serviceType "LoadBalancer") .loadBalancerIP }}
      loadBalancerIP: {{ .loadBalancerIP }}
      {{- end }}
    {{- end }}
  selector:
    {{- include "xnat-web.selectorLabels" . | nindent 4 }}
  sessionAffinity: "ClientIP"
{{- end }}
3. The Patch file
OK, so let’s have a look at our patch file and see what it is actually doing.
- op: remove
  path: "/spec/sessionAffinity"
Pretty simple really. - op: remove just removes whatever we tell it to in our service.yaml file. If we look through our file, we find spec and then under that we find sessionAffinity and then remove that.
In this case if we remove all the other code to simplify things you get this:
spec:
  sessionAffinity: "ClientIP"
As sessionAffinity is under spec by indentation it will remove the line:
sessionAffinity: "ClientIP"
In this particular case my AWS Cluster needs Service Type to be NodePort so this particular line causes the XNAT deployment to fail, hence the requirement to remove it.
OK so far so good. You can also use add and replace operations so let’s try an add command example as that is slightly more complicated.
Add and Replace commands example
OK continuing with our AWS NodePort example we will add a redirect from port 80 to 443 in the Ingress and replace the existing entry.
In order to do that we need to add a second host path to the charts/releases/xnat/charts/xnat-web/templates/ingress.yaml. Lets look at the original file:
{{- if .Values.ingress.enabled -}}
{{- $fullName := include "xnat-web.fullname" . -}}
{{- $svcPort := .Values.service.port -}}
apiVersion: networking.k8s.io/v1beta1
{{- end }}
kind: Ingress
metadata:
  name: {{ $fullName }}
  labels:
    {{- include "xnat-web.labels" . | nindent 4 }}
  {{- with .Values.ingress.annotations }}
  annotations:
    {{- toYaml . | nindent 4 }}
  {{- end }}
spec:
  {{- if .Values.ingress.tls }}
  tls:
    {{- range .Values.ingress.tls }}
    - hosts:
        {{- range .hosts }}
        - {{ . | quote }}
        {{- end }}
      secretName: {{ .secretName }}
    {{- end }}
  {{- end }}
  rules:
    {{- range .Values.ingress.hosts }}
    - host: {{ .host | quote }}
      http:
        paths:
          {{- range .paths }}
          - path: {{ .path }}
            backend:
              serviceName: {{ $fullName }}
              servicePort: {{ $svcPort }}
          {{- end }}
    {{- end }}
  {{- end }}
This is what we need in our values file to be reflected in the ingress.yaml file:
    hosts:
      - host: "xnat.example.com"
        paths:
        - path: "/*"
          backend:
            serviceName: ssl-redirect
            servicePort: use-annotation
        - path: "/*"
          backend:
            serviceName: "xnat-xnat-web"
            servicePort: 80
And this is what we have at the moment in that file:
  rules:
    {{- range .Values.ingress.hosts }}
    - host: {{ .host | quote }}
      http:
        paths:
          {{- range .paths }}
          - path: {{ .path }}
            backend:
              serviceName: {{ $fullName }}
              servicePort: {{ $svcPort }}
          {{- end }}
As you can see, we are missing a second backend to allow the redirection from http to https.
In kustomization.yaml add the following:
- path: ingress-patch.yaml
  target:
    group: networking.k8s.io
    kind: Ingress
    name: xnat-xnat-web
    version: v1beta1
# ingress-patch.yaml
#
- op: replace
  path: /spec/rules/0/http/paths/0/backend/serviceName
  value: 'ssl-redirect'
- op: replace
  path: /spec/rules/0/http/paths/0/backend/servicePort
  value: 'use-annotation'
- op: add
  path: /spec/rules/0/http/paths/-
  value:
    path: '/*'
    backend:
      serviceName: 'xnat-xnat-web'
      servicePort: 80
OK, so let’s break this down. The top command replaces this:
serviceName: {{ $fullName }}
In this path:
  rules:
      http:
        paths:
            backend:
With a hardcoded serviceName value:
serviceName: 'ssl-redirect'
I removed the extra lines to show you only the relevant section.
The second command replaces:
servicePort: {{ $svcPort }}
In the same path, with the hardcoded value:
servicePort: 'use-annotation'
Now for the add command.
- op: add
  path: /spec/rules/0/http/paths/-
This will add the values in normal yaml syntax here:
spec:
  rules:
      http:
        paths:
          -
NB. I have removed irrelevant lines to simplify the example. If there were already two sets of path directive, replacing or adding to the second one would require this path:
path: /spec/rules/1/http/paths/-
OK so the resultant transformation of the ingress.yaml file will change it to look like this:
spec:
  rules:
      http:
        paths:
          backend:
            serviceName: ssl-redirect
            servicePort: use-annotation
        - path: '/*'
          backend:
            serviceName: 'xnat-xnat-web'
            servicePort: 80
Let’s look at our full kustomization.yaml file with resources and service and ingress patches.
apiVersion: kustomize.config.k8s.io/v1beta1
kind: Kustomization
resources:
- all.yaml
- pv.yaml
patches:
- path: service-patch.yaml
  target:
    kind: Service
    name: xnat-xnat-web
    version: v1
- path: ingress-patch.yaml
  target:
    group: networking.k8s.io
    kind: Ingress
    name: xnat-xnat-web
    version: v1beta1
We are now ready to apply our kustomizations!
4. Bringing it all together
Create a new fle called whatever you like - and make it executable, in my case we will call it hook.sh.
vi hook.sh
chmod 755 hook.sh
#!/bin/bash
# hook.sh
#
cat <&0 > all.yaml
kustomize build && rm all.yaml
This takes the contents of all.yaml and kustomizes it using the kustomization.yaml file with the resources and patches I have previously described. Finally, it deletes all.yaml.
When you run kustomize build it will look for a file called kustomization.yaml to apply the transformations. As the kustomization.yaml file is in the same directory as hook.sh only the kustomize build command is needed, no further directive is required.
5. Deploy the Helm Chart with Kustomize post-renderer
OK to bring it all together and upgrade the XNAT AIS helm chart with your values file as values.yaml in the namespace xnat, run this command:
helm template xnat ais/xnat > all.yaml && \
  helm upgrade xnat ais/xnat -i -f values.yaml -nxnat --post-renderer=./hook.sh
In this case, you need to make sure that the following files are in the same directory:
values.yaml
hook.sh
kustomization.yaml
ingress-patch.yaml
service-patch.yaml
pv.yaml
Further Reading
There are a lot of configuration options for Kustomize and this just touched on the basics.
Kustomize is also really useful for creating dev, staging and production implementations using the same chart. See these articles:
- https://austindewey.com/2020/07/27/patch-any-helm-chart-template-using-a-kustomize-post-renderer/
- https://learnk8s.io/templating-yaml-with-code#using-templates-with-search-and-replace
Nice Tutorial:
1.5 - Linode setup
List of steps to be followed to deploy XNAT in Linode LKE using Helm charts
1. LKE Cluster Setup
Set up the Linode LKE cluster using the link https://www.linode.com/docs/guides/how-to-deploy-an-lke-cluster-using-terraform/
2. Preparing for Tweaks pertaining to Linode
As we are tweaking XNAT Values related to PV access modes, let us check out the charts repo rather than using the AIS helm chart repository.
git clone https://github.com/Australian-Imaging-Service/charts.git
3. Actual Tweaks
Replace the access modes of all Volumes from ReadWriteMany to ReadWriteOnce in charts/releases/xnat/charts/xnat-web
This is because Linode storage only supports ReadWriteOnce at this point of time.
4. Dependency Update
Update the dependency by switching to charts/releases/xnat and execute the following
helm dependency update
5. XNAT Initial Installation
Go to charts/releases and install xnat using helm.
kubectl create namespace xnat

helm install xnat-deployment xnat --values YOUR-VALUES-FILE --namespace=xnat
The XNAT & POSTGRES service should be up and running fine. Linode Storage Class linode-block-storage-retain should have automatically
come in place & PVs will be auto created to be consumed by our mentioned PVCs.
6. Ingress Controller/Load balancer Installation
Install Ingress Controller and provision a Load balancer (Nodebalancer in Linode) by executing these commands
helm repo add ingress-nginx https://kubernetes.github.io/ingress-nginx

helm repo update

helm install ingress-nginx ingress-nginx/ingress-nginx
You may see an output like below
>NAME: ingress-nginx
LAST DEPLOYED: Mon Aug  2 11:51:32 2021
NAMESPACE: default
STATUS: deployed
REVISION: 1
TEST SUITE: None
NOTES:
The ingress-nginx controller has been installed.
It may take a few minutes for the LoadBalancer IP to be available.
7. Domain Mapping
Get the External IP address of the Loadbalancer by running the below command and assign it to any domain or subdomain.
cloud.neura.edu.au is the subdomain for which the loadbalancer IP is assigned in my case.
Please replace it with your domain in this and all upcoming stepskubectl --namespace default get services -o wide -w ingress-nginx-controller
8. HTTP Traffic Routing via Ingress
It is time to create a Ingress object that directs the traffic based on the host/domain to the already available XNAT service.
Get the XNAT service name by issuing the below command and choose the service name that says TYPE as ClusterIP
kubectl get svc -nxnat -l "app.kubernetes.io/name=xnat-web"
Example: xnat-deployment-xnat-web
Using the above service name, write an ingress object to route the external traffic based on the domain name.
apiVersion: networking.k8s.io/v1
kind: Ingress
metadata:
  name: xnat-ingress
  namespace: xnat
  annotations:
    kubernetes.io/ingress.class: nginx
spec:
  rules:
  - host: cloud.neura.edu.au
    http:
      paths:
      - pathType: Prefix
        path: "/"
        backend:
          service:
            name: xnat-deployment-xnat-web
            port:
              number: 80
9. Delete the HTTP Ingress project
After the creation of this Ingress object, make sure cloud.neura.edu.au is routed to the XNAT application over HTTP successfully.Let us delete the ingress object after checking because we will be creating another one with TLS to use HTTPS.
kubectl delete ingress xnat-ingress -nxnat
10. Install cert-manager for Secure Connection HTTPS
Install cert-manager’s CRDs.
kubectl apply -f https://github.com/jetstack/cert-manager/releases/download/v1.3.1/cert-manager.crds.yaml
Create a cert-manager namespace.
kubectl create namespace cert-manager
Add the Helm repository which contains the cert-manager Helm chart.
helm repo add jetstack https://charts.jetstack.io
Update your Helm repositories.
helm repo update
Install the cert-manager Helm chart.
helm install \
  cert-manager jetstack/cert-manager \
  --namespace cert-manager \
  --version v1.3.1
Verify that the corresponding cert-manager pods are now running.
kubectl get pods --namespace cert-manager
You should see a similar output:
>NAME                                       READY   STATUS    RESTARTS   AGE
cert-manager-579d48dff8-84nw9              1/1     Running   3          1m
cert-manager-cainjector-789955d9b7-jfskr   1/1     Running   3          1m
cert-manager-webhook-64869c4997-hnx6n      1/1     Running   0          1m
11. Creation of ClusterIssuer to Issue certificates
Create a manifest file named acme-issuer-prod.yaml that will be used to create a ClusterIssuer resource on your cluster. Ensure you replace user@example.com with your own email address.
apiVersion: cert-manager.io/v1
kind: ClusterIssuer
metadata:
  name: letsencrypt-prod
  namespace: xnat
spec:
  acme:
    email: user@example.com
    server: https://acme-v02.api.letsencrypt.org/directory
    privateKeySecretRef:
      name: letsencrypt-secret-prod
    solvers:
    - http01:
        ingress:
          class: nginx
12. HTTPS Routing with Ingress object leveraging ClusterIssuer
Provision a new Ingress object to use the clusterIssuer for the generation of the certificate and use it
apiVersion: networking.k8s.io/v1
kind: Ingress
metadata:
  name: xnat-ingress-https
  namespace: xnat
  annotations:
    kubernetes.io/ingress.class: "nginx"
    cert-manager.io/cluster-issuer: "letsencrypt-prod"
spec:
  tls:
  - hosts:
    - cloud.neura.edu.au
    secretName: xnat-tls
  rules:
  - host: cloud.neura.edu.au
    http:
      paths:
      - pathType: Prefix
        path: "/"
        backend:
          service:
            name: xnat-deployment-xnat-web
            port:
              number: 80
After the creation of the above ingress https://cloud.neura.edu.au/ should bring up the XNAT application in the web browser
Reference Links
- LKE set up using Cloud Manager
https://www.linode.com/docs/guides/deploy-and-manage-a-cluster-with-linode-kubernetes-engine-a-tutorial/ - LKE set up using Terraform
https://www.linode.com/docs/guides/how-to-deploy-an-lke-cluster-using-terraform/ - Linode Storage Class
https://www.linode.com/docs/guides/deploy-volumes-with-the-linode-block-storage-csi-driver/ - Ingress Controller & Loadbalancer
https://www.linode.com/docs/guides/how-to-deploy-nginx-ingress-on-linode-kubernetes-engine/ - HTTP to HTTPS using cert-manager
https://www.linode.com/docs/guides/how-to-configure-load-balancing-with-tls-encryption-on-a-kubernetes-cluster
1.6 -
Deployments of AIS released service
The /docs/Deployment folder is a dump directory for any documentation related to deployment of the AIS released services. This includes, but is not limited to, deployment examples:
- from different AIS sites
- utilising alternate Cloud services or on-prem deployments
- configuration snippets
Jekyll is used to render these documents and any MarkDown files with the appropriate FrontMatter tags will appear in the Deployment drop-down menu item.
1.7 - XNAT Quick Start Guide
This quick start guide will follow a progression starting from the most basic single instance XNAT deployment up to a full XNAT service.
Please be aware that this is a guide and not considered a production ready service.
Prerequisites
- a Kubernetes service. You can use Microk8s on your workstation if you do not have access to a cloud service.
- Kubectl client installed and configured to access your Kubernetes service
- Helm client installed
Microk8s minimal enabled plugins
microk8s enable dns
microk8s enable rbac
microk8s enable storage
What settings can be modified and where?
helm show values ais/xnat
Just XNAT
Create minimal helm values file ~/values.yaml.
XNAT requires a minimum of 4GiB of RAM and 4x vCPUs. If your system is close to or smaller than these resources then XNAT could take several minutes to start. If so, it is recommended that you add something similar to the settings bellow for your deployment.
As an example, a test conducted (27/5/2025) on a VM with 4GiB of RAM and 4x vCPUs, took just over 6.5 minutes for XNAT to start and present a healthy system.
---
xnat-web:
  resources:
    requests:
      memory: 500Mi
    limits:
      memory: 3000Mi # 1 GiB lower than your system.
  probes:
    startup:
      failureThreshold: 120 # Disables the process watchdog for an extended period of time.
# Setup AIS Helm charts
helm repo add ais https://australian-imaging-service.github.io/charts
helm repo update

# Deploy minimal XNAT
# This command is also used to action changes to the `values.yaml` file
helm upgrade xnat ais/xnat --install --values ~/values.yaml --namespace xnat-demo --create-namespace

# From another terminal you can run the following commnad to watch deployment of resources
watch kubectl -nxnat-demo get all,pv,pvc

# From another terminal run the following command and
# access XNAT web UI from a browser with address `http://localhost:8080`
kubectl -nxnat-demo port-forward service/xnat-xnat-web-0 8080:80
Things to watch out for.
- This deployment will utilise the default storage class configured for your Kubernetes service. If there is no storage class set as default this deployment will not have any persistent volume(s) provisioned and will not complete. Out of scope for this document is how to manually create a Persistent Volume and bind to a Persistent Volume Claim.
kubectl get sc
NAME                          PROVISIONER            RECLAIMPOLICY   VOLUMEBINDINGMODE   ALLOWVOLUMEEXPANSION   AGE
microk8s-hostpath (default)   microk8s.io/hostpath   Delete          Immediate           false                  145d
You can see that Microk8s has a default storage class. However if this was not the case or another storage class was to be used the following would need to be added to your values.yaml file.
---
global:
  storageClass: "microk8s-hostpath"
You should be seeing something similar to the following
$ kubectl -nxnat-demo get all,pvc
NAME                    READY   STATUS    RESTARTS   AGE
pod/xnat-postgresql-0   1/1     Running   30         27d
pod/xnat-xnat-web-0     1/1     Running   30         27d

NAME                               TYPE        CLUSTER-IP       EXTERNAL-IP   PORT(S)          AGE
service/xnat-xnat-web-headless     ClusterIP   None             <none>        80/TCP           27d
service/xnat-postgresql-headless   ClusterIP   None             <none>        5432/TCP         27d
service/xnat-postgresql            ClusterIP   10.152.183.17    <none>        5432/TCP         27d
service/xnat-xnat-web              ClusterIP   10.152.183.193   <none>        80/TCP           27d
service/xnat-xnat-web-dicom-scp    NodePort    10.152.183.187   <none>        8104:31002/TCP   27d

NAME                               READY   AGE
statefulset.apps/xnat-postgresql   1/1     27d
statefulset.apps/xnat-xnat-web     1/1     27d

NAME                                             STATUS   VOLUME                                     CAPACITY   ACCESS MODES   STORAGECLASS        AGE
persistentvolumeclaim/xnat-xnat-web-archive      Bound    pvc-81a7308c-fb64-4acd-9a04-f54dbc6e1e0b   1Ti        RWX            microk8s-hostpath   27d
persistentvolumeclaim/xnat-xnat-web-prearchive   Bound    pvc-357f45aa-79af-4958-a3fe-ec3714e6db13   1Ti        RWX            microk8s-hostpath   27d
persistentvolumeclaim/data-xnat-postgresql-0     Bound    pvc-45d917d7-8660-4183-92cb-0e07c59d9fa7   8Gi        RWO            microk8s-hostpath   27d
persistentvolumeclaim/cache-xnat-xnat-web-0      Bound    pvc-f868215d-0962-4e99-95f5-0cf09440525f   10Gi       RWO            microk8s-hostpath   27d
2 - Development
2.1 - Continuous Integration / Continuous Delivery
Tools
| Name | Description | Use |
|---|---|---|
| Kind | Tool for running local Kubernetes clusters using Docker container “nodes” | Testing chart functionality |
2.2 - Development workstation with Multipass on MacOS
Requirements
- An enabled hypervisor, either HyperKit or VirtualBox. HyperKit is the default hypervisor backend on MacOS Yosemite or later installed on a 2010 or newer Mac.
- Administrative access on Mac.
Download, install and setup Multipass
There are two ways to install Multipass on MacOS: brew or the installer. Using brew is the simplest:
$ brew install --cask multipass
Check Multipass version which you are running:
$ multipass version
Start a Multipass VM, then install Microk8s Brew is the easiest way to install Microk8s, but it is not so easy to install an older version. At the time of writing, Microk8s latest version v1.20 seems to have problem for Ingress to attach an external IP (127.0.0.1 on Microk8s vm). We recommend manual installation.
$ multipass launch --name microk8s-vm --cpus 2 --mem 4G --disk 40G
Get a shell inside the newly created VM:
multipass shell microk8s-vm
Install Microk8s v1.19 in the VM:
$ sudo snap install microk8s --classic --channel=1.19/stable
$ sudo iptables -P FORWARD ACCEPT
List your Multik8s VM:
$ multipass list
Shutdown the VM
$ multipass stop microk8s-vm
Delete and cleanup the VM:
$ multipass delete microk8s-vm
$ multipass purge
2.3 - NixOS: Minikube
NixOS + Minikube
# Configure environment
cat <<EOF > default.nix
{ pkgs ? import <nixpkgs> {} }:
pkgs.mkShell {
  buildInputs = with pkgs; [
    minikube
    kubernetes-helm
    jq
  ];

  shellHook = ''
    alias kubectl='minikube kubectl'
    . <(minikube completion bash)
    . <(helm completion bash)

    # kubectl and docker completion require the control plane to be running
    if [ $(minikube status -o json | jq -r .Host) = "Running" ]; then
            . <(kubectl completion bash)
            . <(minikube -p minikube docker-env)
    fi
  '';
}
EOF
nix-shell

minikube start

# Will block the terminal, will need to open a new one
minikube dashboard

# Creates "default-http-backend"
minikube addons enable ingress
2.4 - Ubuntu: microk8s
microk8s
sudo snap install microk8s --classic
microk8s enable dns fluentd ingress metrics-server prometheus rbac registry storage

# Install and configure the kubectl client
sudo snap install kubectl --classic
# Start running more than one cluster and you will be glad you did these steps
microk8s config |sed 's/\(user\|name\): admin/\1: microk8s-admin/' >${HOME}/.kube/microk8s.config
# On Mac, use below to set up the admin user
# microk8s config |sed 's/\([user\|name]\): admin/\1: microk8s-admin/' >${HOME}/.kube/microk8s.config
cat >>${HOME}/.profile <<'EOT'
DIR="${HOME}/.kube"
if [ -d "${DIR}" ]; then
  KUBECONFIG="$(/usr/bin/find $DIR \( -name 'config' -o -name '*.config' \) \( -type f -o -type l \) -print0 | tr '\0' ':')"
  KUBECONFIG="${KUBECONFIG%:}"
  export KUBECONFIG
fi
EOT
# logout or run the above code in your current shell to set the KUBECONFIG environment variable
kubectl config use-context microk8s
If you have an issue with the operation of microk8s microk8s inspect command is you best friend.
microk8s notes
To enable a Load Balancer microk8s comes with metalLB and configures Layer2 mode settings by default. You will be asked for an IPv4 block of addresses, ensure that the address block is in the same Layer 2 as your host, unused and reserved for this purpose (you may need to alter your DHCP service). When you are ready perform the following:
$ microk8s enable metallb
- microk8s does not support IPv6 at this time!
2.5 - Windows 10: Multipass
Development workstation with Multipass on Windows 10
Requirements:
- An enabled Hypervisor, either Hyper-V (recommended) or VirtualBox (introduces certain networking issues, if you are using VirtualBox on Windows 10 then use the VirtualBox UI directly or another package such as Vagrant)
- Administrative access to Windows 10 workstation. This is required for:
- Enabling Hyper-V if not already configured, or installing Oracle VirtualBox
- Installing Multipass
- Altering the local DNS override file
c:\Windows\System32\drivers\etc\hosts
Windows PowerShell console as Administrator
Right click Windows PowerShell and select Run as Administrator, enter your Admin credentials. From the Administrator: Windows PowerShell console perform the following.
- Open the DNS
hostsfile for editing.
Warning
Edit this file with care and ensure that you only append entries while leaving the original entries intact.
Also be aware that you have started Notepad as an Administrator allowing this application to be able to edit any file on your system. Close the editor and PowerShell console if you intend to leave your workstation!
PS C:\> notepad.exe C:\Windows\System32\drivers\etc\hosts
- Verify Hyper-V state; the bellow shows that Hyper-V is Enabled on this workstation
PS C:\> Get-WindowsOptionalFeature -FeatureName Microsoft-Hyper-V-All -Online

FeatureName      : Microsoft-Hyper-V-All
DisplayName      : Hyper-V
Description      : Provides services and management tools for creating and running virtual machines and their
                   resources.
RestartRequired  : Possible
State            : Enabled
CustomProperties :
If this is not the case!
PS C:\> Enable-WindowsOptionalFeature -Online -FeatureName Microsoft-Hyper-V -All
Download, install and setup Multipass
From the Multipass website, verify that your Windows 10 workstation meets the minimum requirements and then download the Windows installation file.
- Select
Startbutton and then select Settings. - In
Settings, selectSystem > Aboutor type about in the search box. - Under
Windows specificationsverifyEditionandVersion
Follow the installation instructions from the Multipass site selecting the preferred Hypervisor.
NB: The Environment variable that configure the search PATH to find the Multipass binaries will not be available until you logout and log back in.
Edit the workstations local DNS lookup/override file
This is required to direct your workstations browser and other clients to the development VM which runs your CTP and/or XNAT service.
For each service requiring a DNS entry you will need to add an entry into your hosts file. From your Notepad application opened as an Administrator you will need to enter the following.
C:\Windows\System32\drivers\etc\hosts
IP_Address_of_the_VM fqdn.service.name fqdn2.service.name
Get the IP address of your VM
PS C:\> multipass exec vm-name -- ip addr
So if your VM’s IP address is 192.168.11.93 and your service FQDN is xnat.cmca.dev.local add the following entry into C:\Windows\System32\drivers\etc\hosts file and save.
C:\Windows\System32\drivers\etc\hosts
192.168.11.93 xnat.cmca.dev.local
Launch Ubuntu 20.04 LTS (Focal) with AIS development tools
PS C:\Users\00078081\ais> Invoke-WebRequest https://raw.githubusercontent.com/Australian-Imaging-Service/charts/main/contrib/cloud-init/user-data-dev-microk8s.yaml -OutFile user-data-dev-microk8s.yaml
PS C:\Users\00078081\ais> multipass launch --cpus 4 --mem 2G -nais-dev --cloud-init .\user-data-dev-microk8s.yaml
2.6 - XNAT chart README
# add the required helm repositories
helm repo add bitnami https://charts.bitnami.com/bitnami

# import the helm chart dependencies (e.g., PostgreSQL) from the xnat chart directory
# ensure you have cloned the repo and changed to charts/xnat directory before running this command
helm dependency update

# view the helm output without deployment from the xnat chart directory
helm install --debug --dry-run xnat ais/xnat  2>&1 |less

# create xnat namespace in kubernetes
kubectl create ns xnat

# Deploy the AIS XNAT service
helm upgrade xnat ais/xnat --install --values ./my-site-overrides.yaml --namespace xnat

# Watch the AIS goodness
watch kubectl -nxnat get all

# watch the logs scroll by
kubectl -nxnat logs xnat-xnat-web-0 -f

# find out what happened if pod does not start
kubectl -nxnat get pod xnat-xnat-web-0 -o json

# view the persistent volumes
kubectl -nxnat get pvc,pv

# view the content of a secret
kubectl -nxnat get secret xnat-xnat-web -o go-template='{{ index .data "xnat-conf.properties" }}' | base64 -d

# tear it all down
helm delete xnat -nxnat
kubectl -nxnat delete pod,svc,pvc --all
kubectl delete namespace xnat
2.7 - References
References (Must reads!)
2.8 -
Development instructions, recommendations, etc…
The /docs/_development folder is a dump directory for any documentation related to setup and practices of development related to the AIS released services.
Jekyll is used to render these documents and any MarkDown files with the appropriate FrontMatter tags will appear in the Development drop-down menu item.
3 - Operations
3.1 - Integrating AAF with AIS Kubernetes XNAT Deployment
Applying for AAF Integration ClientId and Secret
AAF have several services they offer which authenticate users, for example, Rapid Connect. We are interested in the AAF OIDC RP service. Please contact AAF Support via email at support@aaf.net.au to apply for a ClientId and Secret.
They will ask you these questions:
- The service’s redirect URL - a redirect URL based on an actual URL rather than IP address and must use HTTPS.
- A descriptive name for the service.
- The organisation name, which must be an AAF subscriber, of the service.
- Indicate the service’s purpose - development/testing/production-ready.
- Your Keybase account id to share the credentials securely.
For 1. This is extremely important and based on two options in the openid-provider.properties file:
siteUrlpreEstablishedRedirUri
We will use this example below (this is the correct syntax):
openid-provider.properties
siteUrl=https://xnat.example.com
preEstablishedRedirUri=/openid-login
In this case, the answer to 1 should be https://xnat.example.com/openid-login Submitting https://xnat.example.com will lead to a non functional AAF setup.
- Can be anything – preferably descriptive.
- Exactly what it says. Mostly the university name depending on organisation
- This is important as it will dictate the AAF Servers your service will authenticate against.
If it is a testing or development environment, you will use the following details:
openid.aaf.accessTokenUri=https://central.test.aaf.edu.au/providers/op/token
openid.aaf.userAuthUri=https://central.test.aaf.edu.au/providers/op/authorize
For production environments (notice no test in the URLs):
openid.aaf.accessTokenUri=https://central.aaf.edu.au/providers/op/token
openid.aaf.userAuthUri=https://central.aaf.edu.au/providers/op/authorize
For 5. Just go to https://keybase.io/ and create an account to provide to AAF support so you can receive the ClientId and ClientSecret securely.
Installing the AAF Plugin in a working XNAT environment
There have been long standing issues with the QCIF plugin that have been resolved by the AIS Deployment team – namely unable to access any projects – see image below.
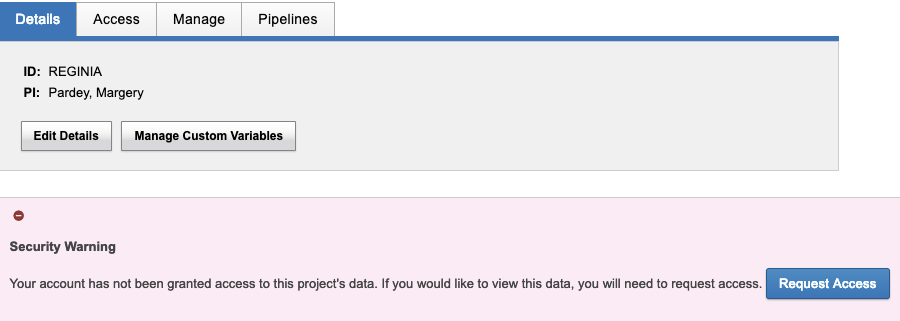
This issue occurred regardless of project access permissions. You would receive this error message trying to access your own project!
AIS Deployment team created a forked version of the plugin which fixes this issue. You can view it here:
https://github.com/Australian-Imaging-Service/xnat-openid-auth-plugin
To deploy to XNAT, navigate to the XNAT home/ plugins folder on your XNAT Application Server – normally /data/xnat/home/plugins and then download. Assuming Linux:
wget https://github.com/Australian-Imaging-Service/xnat-openid-auth-plugin/releases/download/1.0.2/xnat-openid-auth-plugin-all-1.0.2.jar
Please note this was the latest version at the time of writing this document. Please check here to see if there have been updated versions:
https://github.com/Australian-Imaging-Service/xnat-openid-auth-plugin/releases
You now have xnat-openid-auth-plugin-all-1.0.2.jar in /data/xnat/home/plugins.
You now need the configuration file which will be (assuming previous location for XNAT Home directory):
/data/xnat/home/config/auth/openid-provider.properties
You will need to create this file.
Review this sample file and tailor to your needs:
I will provide an example filled out properties file with some caveats below.
Warning
All of the keys are case sensitive, incorrectly capitalised entries will result in non-working AAF integration!These need to be left as is
auth.method=openid
type=openid
provider.id=openid
visible=true
Set these values to false if you want an Admin to enable and verify the account before users are allowed to login - recommended
auto.enabled=false
auto.verified=false
Name displayed in the UI – not particularly important
name=OpenID Authentication Provider
Toggle username & password login visibility
disableUsernamePasswordLogin=false
List of providers that appear on the login page, see options below. In our case we only need aaf but you can have any openid enabled provider
enabled=aaf
Site URL - the main domain, needed to build the pre-established URL below. See notes at top of document
siteUrl=https://xnat.example.com
preEstablishedRedirUri=/openid-login
AAF ClientID and Secret – CASE SENSITIVE - openid.aaf.clientID for example would mean AAF plugin will not function These are fake details but an example – no “ (quotation marks) required.
openid.aaf.clientId=123jsdjd
openid.aaf.clientSecret=chahdkdfdhffkhf
The providers are covered at the top of the document
openid.aaf.accessTokenUri=https://central.test.aaf.edu.au/providers/op/token
openid.aaf.userAuthUri=https://central.test.aaf.edu.au/providers/op/authorize
You can find more details on the remaining values here:
https://github.com/Australian-Imaging-Service/xnat-openid-auth-plugin
openid.aaf.scopes=openid,profile,email
If the below is wrong the AAF logo will not appear on the login page and you won’t be able to login
openid.aaf.link=<p>To sign-in using your AAF credentials, please click on the button below.</p><p><a href="/openid-login?providerId=aaf"><img src="/images/aaf_service_223x54.png" /></a></p>
Flag that sets if we should be checking email domains
openid.aaf.shouldFilterEmailDomains=false
Domains below are allowed to login, only checked when shouldFilterEmailDomains is true
openid.aaf.allowedEmailDomains=example.com
Flag to force the user creation process, normally this should be set to true
openid.aaf.forceUserCreate=true
Flag to set the enabled property of new users, set to false to allow admins to manually enable users before allowing logins, set to true to allow access right away
openid.aaf.userAutoEnabled=false
Flag to set the verified property of new users – use in conjunction with auto.verified
openid.aaf.userAutoVerified=false
Property names to use when creating users
openid.aaf.emailProperty=email
openid.aaf.givenNameProperty=given_name
openid.aaf.familyNameProperty=family_name
If you create your openid-provider.properties file with the above information, tailored to your environment, along with the plugin:/data/xnat/home/plugins/xnat-openid-auth-plugin-all-1.0.2.jar
You should only need to restart Tomcat to enable login. This assumes you have a valid AAF organisation login.
Using AAF with the AIS Kubernetes Chart Deployment
The AIS Charts Helm template has all you need to setup a completely functional XNAT implementation in minutes, part of this is AAF integration.
Prerequisites:
• A functional HTTPS URL with valid SSL certificate for your Kubernetes cluster. See the top of this document for details to provide to AAF.
• A ClientId and Secret provided by AAF.
• A Load Balancer or way to connect externally to your Kubernetes using the functional URL with SSL certificate.
Before you deploy the Helm template, clone it via git here:
git clone https://github.com/Australian-Imaging-Service/charts.git
then edit the following file:charts/releases/xnat/charts/xnat-web/values.yaml
And update the following entries underneath openid:
    preEstablishedRedirUri: "/openid-login"
      siteUrl: ""
      #List of providers that appear on the login page
      providers:
        aaf:
          accessTokenUri: https://central.aaf.edu.au/providers/op/token
          #accessTokenUri: https://central.test.aaf.edu.au/providers/op/token
          userAuthUri: https://central.aaf.edu.au/providers/op/authorize
          #userAuthUri: https://central.test.aaf.edu.au/providers/op/authorize
          clientId: ""
          clientSecret: ""
Comment out the Test or Production providers depending on which environment your XNAT will reside in. To use the example configuration from the previous configuration, the completed entries will look like this:
    preEstablishedRedirUri: "/openid-login"
      siteUrl: "https://xnat.example.com"
      #List of providers that appear on the login page
      providers:
        aaf:
          accessTokenUri: https://central.test.aaf.edu.au/providers/op/token
          userAuthUri: https://central.test.aaf.edu.au/providers/op/authorize
          clientId: "123jsdjd"
          clientSecret: "chahdkdfdhffkhf"
You can now deploy your Helm template by following the README here: https://github.com/Australian-Imaging-Service/charts In order for this to work, you will need to point your domain name and SSL certificate to the Kubernetes xnat-web pod, which is outside of the scope of this document.
Troubleshooting
Most of the above documentation should remove the need for troubleshooting but a few things to bear in mind.
All of the openid-provider.properties file and the values.yaml file mentioned above for either existing XNAT deployments are CASE SENSITIVE. The entries must match exactly AAF won’t work.
If you get a 400 error message when redirecting from XNAT to AAF like so:
The ClientId entry is wrong. This happened before when the properties file had ClientId like this:
openid.aaf.clientIDrather than:
openid.aaf.clientIdYou can see client_id section is empty. This wrongly capitalised entry results in the clientId not be passed to the URL to redirect and a 400 error message.
Check the log files. The most useful log file for error messages is the Tomcat localhost logfile. On RHEL based systems, this can be found here (example logfile):
/var/log/tomcat7/localhost.2021-08-08.logYou can also check the XNAT logfiles, mostly here (depending on where XNAT Home is on your system):
/data/xnat/home/logs
3.2 - Autoscaling XNAT on Kubernetes with EKS
There are three types of autoscaling that Kubernetes offers:
Horizontal Pod Autoscaling
Horizontal Pod Autoscaling (HPA) is a technology that scales up or down the number of replica pods for an application based on resource limits specified in a values file.Vertical Pod Autoscaling
Vertical Pod Autoscaling (VPA) increases or decreases the resources to each pod when it gets to a certain percentage to help you best deal with your resources. After some testing this is legacy and HPA is preferred and also built into the Helm chart so we won’t be utilising this technology.Cluster-autoscaling
Cluster-autoscaling is where the Kubernetes cluster itself spins up or down new Nodes (think EC2 instances in this case) to handle capacity.
You can’t use HPA and VPA together so we will use HPA and Cluster-Autoscaling.
Prerequisites
- Running Kubernetes Cluster and XNAT Helm Chart AIS Deployment
- AWS Application Load Balancer (ALB) as an Ingress Controller with some specific annotations
- Resources (requests and limits) need to specified in your values file
- Metrics Server
- Cluster-Autoscaler
You can find more information on applying ALB implementation for the AIS Helm Chart deployment in the ALB-Ingress-Controller document in this repo, so will not be covering that here, save to say there are some specific annotations that are required for autoscaling to work effectively.
Specific annotations required:
alb.ingress.kubernetes.io/target-group-attributes: "stickiness.enabled=true,stickiness.lb_cookie.duration_seconds=1800,load_balancing.algorithm.type=least_outstanding_requests"
alb.ingress.kubernetes.io/target-type: ip
Let’s breakdown and explain the sections.
Change the stickiness of the Load Balancer:
It is important to set a stickiness time on the load balancer. This forces you to the same pod all the time and retains your session information.
Without stickiness, after logging in, the Database thinks you have logged but the Load Balancer can alternate which pod you go to. The session details are kept on each pod so the new pod thinks you aren’t logged in and keeps logging you out all the time. Setting stickiness time reasonably high – say 30 minutes, can get round this.
stickiness.enabled=true,stickiness.lb_cookie.duration_seconds=1800
Change the Load Balancing Algorithm for best performance:
load_balancing.algorithm.type=least_outstanding_requests
Change the Target type:
Not sure why but if target-type is set to instance and not ip, it disregards the stickiness rules.
alb.ingress.kubernetes.io/target-type: ip
Resources (requests and limits) need to specified in your values file
In order for HPA and Cluster-autoscaling to work, you need to specify resources - requests and limits, in the AIS Helm chart values file, or it won’t know when to scale.
This makes sense because how can you know when you are running out of resources to start scaling up if you don’t know what your resources are to start with?
In your values file add the following lines below the xnat-web section (please adjust the CPU and memory to fit with your environment):
  resources:
    limits:
      cpu: 1000m
      memory: 3000Mi
    requests:
      cpu: 1000m
      memory: 3000Mi
You can read more about what this means here:
https://kubernetes.io/docs/tasks/configure-pod-container/assign-cpu-resource/
From my research with HPA, I discovered a few important facts.
- Horizontal Pod Autoscaler doesn’t care about limits, it bases autoscaling on requests. Requests are meant to be the minimum needed to safely run a pod and limits are the maximum. However, this is completely irrelevant for HPA as it ignores the limits altogether so I specify the same resources for requests and limits. See this issue for more details:
https://github.com/kubernetes/kubernetes/issues/72811
- XNAT is extremely memory hungry, and any pod will use approximately 750MB of RAM without doing anything. This is important as when the requests are set below that, you will have a lot of pods scale up, then scale down and no consistency for the user experience. This will play havoc with user sessions and annoy everyone a lot. Applications - specifically XNAT Desktop can use a LOT of memory for large uploads (I have seen 12GB RAM used on an instance) so try and specify as much RAM as you can for the instances you have. In the example above I have specified 3000MB of RAM and 1 vCPU. The worker node instance has 4 vCPUs and 4GB. You would obviously use larger instances if you can. You will have to do some testing to work out the best Pod to Instance ratio for your environment.
Metrics Server
Download the latest Kubernetes Metrics server yaml file. We will need to edit it before applying the configuration or HPA won’t be able to see what resources are being used and none of this will work.
wget https://github.com/kubernetes-sigs/metrics-server/releases/latest/download/components.yaml
Add the following line:
- --kubelet-insecure-tls
to here:
    spec:
      containers:
      - args:
Completed section should look like this:
    spec:
      containers:
      - args:
        - --kubelet-insecure-tls
        - --kubelet-preferred-address-types=InternalIP,ExternalIP
        - --cert-dir=/tmp
        - --secure-port=443
        - --kubelet-use-node-status-port
        - --metric-resolution=15s
Now apply it to your Cluster:
k -nkube-system apply -f components.yaml
Congratulations - you now have an up and running Metrics server.
You can read more about Metrics Server here:
https://github.com/kubernetes-sigs/metrics-server
Cluster-Autoscaler
There are quite a lot of ways to use the Cluster-autoscaler - single zone node clusters deployed in single availability zones (no AZ redundancy), single zone node clusters deployed in multiple Availability zones or single Cluster-autoscalers that deploy in multiple Availability Zones. In this example we will be deploying the autoscaler in multiple Availability Zones (AZ’s).
In order to do this, a change needs to be made to the StorageClass configuration used.
Delete whatever StorageClasses you have and then recreate them changing the VolumeBindingMode. At a minimum you will need to change the GP2 / EBS StorageClass VolumeBindingMode but if you are using a persistent volume for archive / prearchive, that will also need to be updated.
Change this:
apiVersion: storage.k8s.io/v1
kind: StorageClass
metadata:
  name: gp2
  annotations:
    storageclass.kubernetes.io/is-default-class: "true"
provisioner: kubernetes.io/aws-ebs
volumeBindingMode: Immediate
parameters:
  fsType: ext4
  type: gp2
to this:
apiVersion: storage.k8s.io/v1
kind: StorageClass
metadata:
  name: gp2
  annotations:
    storageclass.kubernetes.io/is-default-class: "true"
provisioner: kubernetes.io/aws-ebs
volumeBindingMode: WaitForFirstConsumer
parameters:
  fsType: ext4
  type: gp2
The run the following commands (assuming the file above is called storageclass.yaml):
kubectl delete sc --all
kubectl apply -f storageclass.yaml
This stops pods trying to bind to volumes in different AZ’s.
You can read more about this here:
https://aws.amazon.com/blogs/containers/amazon-eks-cluster-multi-zone-auto-scaling-groups/
Relevant section:
If you need to run a single ASG spanning multiple AZs and still need to use EBS volumes you may want to change the default VolumeBindingMode to WaitForFirstConsumer as described in the documentation here. Changing this setting “will delay the binding and provisioning of a PersistentVolume until a pod using the PersistentVolumeClaim is created.” This will allow a PVC to be created in the same AZ as a pod that consumes it.
If a pod is descheduled, deleted and recreated, or an instance where the pod was running is terminated then WaitForFirstConsumer won’t help because it only applies to the first pod that consumes a volume. When a pod reuses an existing EBS volume there is still a chance that the pod will be scheduled in an AZ where the EBS volume doesn’t exist.
You can refer to AWS documentation for how to install the EKS Cluster-autoscaler:
https://docs.aws.amazon.com/eks/latest/userguide/cluster-autoscaler.html
This is specific for your deployment IAM roles, clusternames etc, so will not specified here.
Configure Horizontal Pod Autoscaler
Add the following lines into your values file under the xnat-web section:
  autoscaling:
    enabled: true
    minReplicas: 2
    maxReplicas: 100
    targetCPUUtilizationPercentage: 80
    targetMemoryUtilizationPercentage: 80
Tailor it your own environment. this will create 2 replicas (pods) at start up, up to a limit of 100 replicas, and will scale up pods when 80% CPU and 80% Memory are utilised - read more about that again here:
https://kubernetes.io/docs/tasks/configure-pod-container/assign-cpu-resource/
This is the relevant parts of my environment when running the get command:
k -nxnat get horizontalpodautoscaler.autoscaling/xnat-xnat-web
NAME            REFERENCE                   TARGETS           MINPODS   MAXPODS   REPLICAS   AGE
xnat-xnat-web   StatefulSet/xnat-xnat-web   34%/80%, 0%/80%   2         100       2          3h29m
As you can see 34% of memory is used and 0% CPU. Example of get command for pods - no restarts and running nicely.
k -nxnat get pods
NAME                  READY   STATUS    RESTARTS   AGE
pod/xnat-xnat-web-0   1/1     Running   0          3h27m
pod/xnat-xnat-web-1   1/1     Running   0          3h23m
Troubleshooting
Check Metrics server is working (assuming in the xnat namespace) and see memory and CPU usage:
kubectl top pods -nxnat
kubectl top nodes
Check Cluster-Autoscaler logs:
kubectl logs -f deployment/cluster-autoscaler -n kube-system
Check the HPA:
kubectl -nxnat describe horizontalpodautoscaler.autoscaling/xnat-xnat-web
3.3 - Docker Swarm with XNAT
Setting up Docker Swarm
A complete explanation of how to setup Docker Swarm is outside the scope of this document but you can find some useful articles here:
https://scalified.com/2018/10/08/building-jenkins-pipelines-docker-swarm/
https://docs.docker.com/engine/swarm/swarm-tutorial/create-swarm/
https://docs.docker.com/engine/swarm/ingress/
Setting up with AWS:
https://semaphoreci.com/community/tutorials/bootstrapping-a-docker-swarm-mode-cluster
Pipelines
XNAT uses pipelines to perform various different processes - mostly converting image types to other image types (DICOM to NIFTI for example).
In the past this was handled on the instance as part of the XNAT program, then as a docker server on the instance and finally, externally as an external docker server, either directly or using Docker swarm.
XNAT utilises the Container service which is a plugin to perform docker based pipelines. In the case of Kubernetes, docker MUST be run externally so Docker swarm is used as it provides load balancing.
Whilst the XNAT team work on replacing the Container service on Docker Swarm with a Kubernetes based Container service, Docker swarm is the most appropriate stop gap option.
Prerequisites
You will require the Docker API endpoint opened remotely so that XNAT can access and send pipeline jobs to it. For security, this should be done via HTTPS (not HTTP).
Standard port is TCP 2376. With Docker Swarm enabled you can send jobs to any of the manager or worker nodes and it will automatically internally load balance. I chose to use the Manager node’s IP and pointed DNS to it.
You should lock access to port 2376 to the Kubernetes XNAT subnets only using firewalls or Security Group settings. You can also use an external Load balancer with certificates which maybe preferred.
If the certificates are not provided by a known CA, you will need to add the certificates (server, CA and client) to your XNAT container build so choosing a proper certificate from a known CA will make your life easier.
If you do use self signed certificates, you will need create a folder, add the certificates and then specify that folder in the XNAT GUI > Administer > Plugin Settings > Container Server Setup > Edit Host Name. In our example case:
Certificate Path: /usr/local/tomcat/certs
Access from the Docker Swarm to the XNAT shared filesystem - at a minimum Archive and build. The AIS Helm chart doesn’t have /data/xnat/build setup by default but without this Docker Swarm can’t write the temporaray files it needs and fails.
Setup DNS and external certificates
Whether you will need to create self signed certificates or public CA verified ones, you will need a fully qualified domain name to create them against.
I suggest you set an A record to point to the Manager node IP address, or a Load Balancer which points to all nodes. Then create the certificates against your FQDN - e.g. swarm.example.com.
Allow remote access to Docker API endpoint on TCP 2376
To enable docker to listen on port 2376 edit the service file or create /etc/docker/daemon.json.
We will edit the docker service file. Remember to specify whatever certificates you will be using in here. They will be pointing to your FQDN - in our case above, swarm.example.com.
systemctl edit docker
[Service]
ExecStart=
ExecStart=/usr/bin/dockerd -H tcp://0.0.0.0:2376 --tlsverify --tlscacert /root/.docker/ca.pem --tlscert /root/.docker/server-cert.pem -tlskey /root/.docker/server-key.pem -H unix:///var/run/docker.sock
systemctl restart docker
Repeat on all nodes. Docker Swarm is now listening remotely on TCP 2376.
Secure access to TCP port 2376
Add a firewall rule to only allow access to TCP port 2376 from the Kubernetes subnets.
Ensure Docker Swarm nodes have access to the XNAT shared filesystem
Without access to the Archive shared filesystem Docker cannot run any pipeline conversions. This seems pretty obvious. Less obvious however is that the XNAT Docker Swarm requires access to the Build shared filesystem to run temporary jobs before writing back to Archive upon completion.
This presents a problem as the AIS Helm Chart does not come with a persistent volume for the Build directory, so we need to create one.
Create a volume outside the Helm Chart and then present it in your values file. In this example I created a custom class. Make sure accessMode is ReadWriteMany so Docker Swarm nodes can access.
  volumes:
    build:
      accessMode: ReadWriteMany
      mountPath: /data/xnat/build
      storageClassName: "custom-class"
      volumeMode: Filesystem
      persistentVolumeReclaimPolicy: Retain
      persistentVolumeClaim:
        claimName: "build-xnat-xnat-web"
      size: 10Gi
You would need to create the custom-class storageclass and apply it first or the volume won’t be created. In this case, create a file - storageclass.yaml and add the followinng contents:
apiVersion: storage.k8s.io/v1
kind: StorageClass
metadata:
  name: custom-class
provisioner: kubernetes.io/no-provisioner
volumeBindingMode: WaitForFirstConsumer
You can then apply it:
kubectl apply -f storageclass.yaml
Of course you may want to use an existing Storage Class so this maybe unnecessary, it is just an example.
Apply the Kubernetes volume file first and then apply the Helm chart and values file. You should now see something like the following:
kubectl get -nxnat pvc,pv
NAME                                             STATUS   VOLUME                                     CAPACITY   ACCESS MODES   STORAGECLASS   AGE
persistentvolumeclaim/archive-xnat-xnat-web      Bound    archive-xnat-xnat-web                      10Gi       RWX            custom-class   5d1h
persistentvolumeclaim/build-xnat-xnat-web        Bound    build-xnat-xnat-web                        10Gi       RWX            custom-class   5d1h
persistentvolumeclaim/cache-xnat-xnat-web-0      Bound    pvc-b5b72b92-d15f-4a22-9b88-850bd726d1e2   10Gi       RWO            gp2            5d1h
persistentvolumeclaim/prearchive-xnat-xnat-web   Bound    prearchive-xnat-xnat-web                   10Gi       RWX            custom-class   5d1h

NAME                                                        CAPACITY   ACCESS MODES   RECLAIM POLICY   STATUS   CLAIM                           STORAGECLASS   REASON   AGE
persistentvolume/archive-xnat-xnat-web                      10Gi       RWX            Retain           Bound    xnat/archive-xnat-xnat-web      custom-class            5d1h
persistentvolume/build-xnat-xnat-web                        10Gi       RWX            Retain           Bound    xnat/build-xnat-xnat-web        custom-class            5d1h
persistentvolume/prearchive-xnat-xnat-web                   10Gi       RWX            Retain           Bound    xnat/prearchive-xnat-xnat-web   custom-class            5d1h
persistentvolume/pvc-b5b72b92-d15f-4a22-9b88-850bd726d1e2   10Gi       RWO            Delete           Bound    xnat/cache-xnat-xnat-web-0      gp2                     5d1h
As you can see, the build directory is now a mounted volume. You are now ready to mount the volumes on the Docker swarm nodes.
Depending how you presented your shared filesystem, just create the directories on the Docker swarm nodes and manager (if the manager is also a worker), add to /etc/fstab and mount the volumes.
To make your life easier use the same file structure for the mounts - i.e build volume mounted in /data/xnat/build and archive volume mounted in /data/xnat/archive. If you don’t do this you will need to specify the Docker swarm mounted XNAT directories in the XNAT GUI.
Add your Docker Swarm to XNAT Plugin Settings
You can read about the various options in the official XNAT documentation on their website here:
https://wiki.xnat.org/container-service/installing-and-enabling-the-container-service-in-xnat-126156821.html
https://wiki.xnat.org/container-service/configuring-a-container-host-126156926.html
In the XNAT GUI, go to Administer > Plugin Settings > Container Server Setup and under Docker Server setup select > New Container host.
In our above example, for host name you would select swarm.example.com, URL would be https://swarm.example.com:2376 and certificate path would be /usr/local/tomcat/certs. As previously mentioned, it is desirable to have public CA and certificates to avoid the needs for specifying certificates at all here.
Select Swarm Mode to “ON”.
You will need to select Path Translation if you DIDN’T mount the Docker swarm XNAT directories in the same place.
The other options are optional.
Once applied make sure that Status is “Up”. The Image hosts section should also now have a status of Up.
You can now start adding your Images & Commands in the Administer > Plugin Settings > Images & Commands section.
Troubleshooting
If you have configured docker swarm to listen on port 2376 but status says down, firstly check you can telnet or netcat to the port first locally, then remotely. From one of the nodes:
nc -zv 127.0.0.1 2376
or
telnet 127.0.0.1 2376
If you can, try remotely from a location that has firewall ingress access. In our example previously, try:
nc -zv swarm.example.com 2376
telnet swarm.example.com 2376
Make sure the correct ports are open and accessible on the Docker swarm manager:
The network ports required for a Docker Swarm to function correctly are:
TCP port 2376 for secure Docker client communication. This port is required for Docker Machine to work. Docker Machine is used to orchestrate Docker hosts.
TCP port 2377. This port is used for communication between the nodes of a Docker Swarm or cluster. It only needs to be opened on manager nodes.
TCP and UDP port 7946 for communication among nodes (container network discovery).
UDP port 4789 for overlay network traffic (container ingress networking).
Make sure docker service is started on all docker swarm nodes.
If Status is set to Up and the container automations are failing, confirm the archive AND build shared filesystems are properly mounted on all servers - XNAT and Docker swarm. A Failed (Rejected) status for a pipeline is likely due to this error.
In this case, as a service can’t be created you won’t have enough time to see the service logs with the usual:
docker service ls
command followed by looking at the service in question, so stop the docker service on the Docker swarm node and start in the foreground, using our service example above:
dockerd -H tcp://0.0.0.0:2376 --tlsverify --tlscacert /root/.docker/ca.pem --tlscert /root/.docker/server-cert.pem --tlskey /root/.docker/server-key.pem -H unix:///var/run/docker.sock
Then upload some dicoms and watch the processing run in the foreground.
Docker Swarm admin guide:
3.4 - External PGSQL DB Connection
Connecting AIS XNAT Helm Deployment to an External Postgresql Database
By default, the AIS XNAT Helm Deployment creates a Postgresql database in a separate pod to be run locally on the cluster.
If the deployment is destroyed the data in the database is lost. This is fine for testing purposes but unsuitable for a production environment.
Luckily a mechanism was put into the Helm template to allow connecting to an External Postgresql Database.
Updating Helm charts values files to point to an external Database
Firstly, clone the AIS Charts Helm template:
git clone https://github.com/Australian-Imaging-Service/charts.git
values-dev.yaml
This file is located in charts/releases/xnat
Current default configuration:
global:
  postgresql:
    postgresqlPassword: "xnat"

postgresql:
  enabled: true
postgresqlExternalName: ""
postgresqlExternalIPs:
  - 139.95.25.8
  - 130.95.25.9
these lines:
postgresql: enabled: true
Needs to be changed to false to disable creation of the Postgresql pod and create an external database connection.
The other details are relatively straightforward - Generally you would only specify either:postgresqlExternalName or postgresqlExternalIPspostgresqlPassword will be your database user password.
An example configuration using a sample AWS RDS instance would look like this:
global:
  postgresql:
    postgresqlPassword: "yourpassword"

postgresql:
  enabled: false
postgresqlExternalName: "xnat.randomstring.ap-southeast-2.rds.amazonaws.com"
Top level values.yaml
This file is also located in charts/releases/xnat
Current default configuration:
global:
  postgresql:
    postgresqlDatabase: "xnat"
    postgresqlUsername: "xnat"
    #postgresqlPassword: ""
    #servicePort: ""

postgresql:
  enabled: true
postgresqlExternalName: ""
postgresqlExternalIPs: []
An example configuration using a sample AWS RDS instance would look like this:
global:
  postgresql:
    postgresqlDatabase: "yourdatabase"
    postgresqlUsername: "yourusername"
    postgresqlPassword: "yourpassword"


postgresql:
  enabled: false
postgresqlExternalName: "xnat.randomstring.ap-southeast-2.rds.amazonaws.com"
Please change the database, username, password and External DNS (or IP) details to match your environment.
xnat-web values.yaml
This file is also located in charts/releases/xnat/charts/xnat-web
Current default configuration:
postgresql:
  postgresqlDatabase: "xnat"
  postgresqlUsername: "xnat"
  postgresqlPassword: "xnat"
Change to match your environment as with the other values.yaml.
You should now be able to connect your XNAT application Kubernetes deployment to your external Postgresql DB to provide a suitable environment for production.
For more details about deployment have a look at the README.md here:https://github.com/Australian-Imaging-Service/charts/tree/main/releases/xnat
Creating an encrypted connection to an external Postgresql Database
The database connection string for XNAT is found in the XNAT home directory - usually/data/xnat/home/config/xnat-conf.properties
By default the connection is unencrypted. If you wish to encrypt this connection you must append to the end of the Database connection string.
Usual string:datasource.url=jdbc:postgresql://xnat-postgresql/yourdatabase
Options:
| Option | Description |
|---|---|
ssl=true | use SSL encryption |
sslmode=require | require SSL encryption |
sslfactory=org.postgresql.ssl.NonValidatingFactory | Do not require validation of Certificate Authority |
The last option is useful as otherwise you will need to import the CA cert into your Java keystone on the docker container.
This means updating and rebuilding the XNAT docker image before being deployed to the Kubernetes Pod and this can be impractical.
Complete string would look like this ( all on one line):datasource.url=jdbc:postgresql://xnat-postgresql/yourdatabase?ssl=true&sslmode=require&sslfactory=org.postgresql.ssl.NonValidatingFactory
Update your Helm Configuration:
Update the following line in charts/releases/xnat/charts/xnat-web/templates/secrets.yaml from:
datasource.url=jdbc:postgresql://{{ template "xnat-web.postgresql.fullname" . }}/{{ template "xnat-web.postgresql.postgresqlDatabase" . }}
to:
datasource.url=jdbc:postgresql://{{ template "xnat-web.postgresql.fullname" . }}/{{ template "xnat-web.postgresql.postgresqlDatabase" . }}?ssl=true&sslmode=require&sslfactory=org.postgresql.ssl.NonValidatingFactory
Then deploy / redeploy.
It should be noted that the Database you are connecting to needs to be encrypted in the first place for this to be successful.
This is outside the scope of this document.
3.5 - Logging With EFK
EFK centralized logging collecting and monitoring
For AIS deployment, we use EFK stack on Kubernetes for log aggregation, monitoring and anyalysis. EFK is a suite of 3 different tools combining Elasticsearch, Fluentd and Kibana.
Elasticsearch nodes form a cluster as the core. You can run single node Elasticsearch. However, a high availablity Elasticsearch cluster requires 3 master nodes as a minimum. If there is one node fails, the Elasticsearch cluster still functions and can self heal.
Kibana instance is used as the visualisation tool for users to interact with the Elasticsearch cluster.
Fluentd is used as the log collector.
In the following guide, we leverage Elastic and Fluentd’s official Helm charts before using Kustomize to customize other required K8s resources.
Creating a new namespace for EFK
$ kubectl create ns efk
Add official Helm repos
For both Elasticsearch and Kibana:
$ helm repo add elastic https://helm.elastic.co
As of this writing, the latest helm repo supports Elasticsearch 7.17.3. It doesn’t work with the latest Elasticsearch v8.3 yet.
For Fluentd:
$ helm repo add fluent https://fluent.github.io/helm-charts
Install Elaticsearch
Adhere to the Elasticsearch security principles, all traffic between nodes in Elasticsearch cluster and traffic between the clients to the cluster needs to be encrypted. You use self signed certicate in this guide.
Generating self signed CA and certificates
- Below we use elasticsearch-certutil to generate password protected self signed CA and certificates, then use openssl tool to convert it to pem formatted certificate
$ docker rm -f elastic-helm-charts-certs || true
$ rm -f elastic-certificates.p12 elastic-certificate.pem elastic-certificate.crt elastic-stack-ca.p12 || true
$ docker run --name elastic-helm-charts-certs -i -w /tmp docker.elastic.co/elasticsearch/elasticsearch:7.16.3 \
/bin/sh -c " \
  elasticsearch-certutil ca --out /tmp/elastic-stack-ca.p12 --pass 'Changeme' && \
  elasticsearch-certutil cert --name security-master --dns security-master --ca /tmp/elastic-stack-ca.p12 --pass 'Changeme' --ca-pass 'Changeme' --out /tmp/elastic-certificates.p12" && \
docker cp elastic-helm-charts-certs:/tmp/elastic-stack-ca.p12 ./ && \
docker cp elastic-helm-charts-certs:/tmp/elastic-certificates.p12 ./ && \
docker rm -f elastic-helm-charts-certs && \
openssl pkcs12 -nodes -passin pass:'Changeme' -in elastic-certificates.p12 -out elastic-certificate.pem
openssl pkcs12 -nodes -passin pass:'Changeme' -in elastic-stack-ca.p12 -out elastic-ca-cert.pem
- Convert the generated CA and certificates to based64 encoded format. These will be used to create the secrets in K8s. Alternatively, you can use kubectl to create the secrets directly
$ base64 -i elastic-certificates.p12 -o elastic-certificates-base64
$ base64 -i elastic-stack-ca.p12 -o elastic-stack-ca-base64
- Generate base64 encoded format for passwords for keystore and truststore.
$ echo -n Changeme | base64 > store-password-base64
Create Helm custom values file elasticsearch.yml
- Creating 3 master nodes Elasticsearch cluster named “elasticsearch”.
clusterName: elasticsearch
replicas: 3
minimumMasterNodes: 2
- Specify the compute resources you allocate to Elasticsearch pod
resources:
  requests:
    cpu: "1000m"
    memory: "2Gi"
  limits:
    cpu: "1000m"
    memory: "2Gi"
- Specify the password for the default super user ’elastic'
secret:
  enabled: false
  password: Changeme
- Specify the protocol used for readniess probe. Use https for all traffic to the cluster on encypted link
protocol: https
- Disable the SSL certificate auto creation, we’ll use self signed certificate created earlier
createCert: false
- Configuration for the volumeClaimTemplate for Elasticsearch statefulset. A customised storage class ’es-ais’ will be defined by Kustomize
volumeClaimTemplate:
  accessModes: ["ReadWriteMany"]
  resources:
    requests:
      storage: 50Gi
  storageClassName: es-ais
- Mount the secret
secretMounts:
  - name: elastic-certificates
    secretName: elastic-certificates
    path: /usr/share/elasticsearch/config/certs
- Add configuration file elasticsearch.yaml. Enable transport TLS for internode encrypted communication and HTTP TLS for client encryped communication. Previously generated certificates are used, they are passed in from the mounted Secrets
esConfig:
  elasticsearch.yml: |
    xpack.security.enabled: true
    xpack.security.transport.ssl.enabled: true
    xpack.security.transport.ssl.verification_mode: certificate
    xpack.security.transport.ssl.client_authentication: required
    xpack.security.transport.ssl.keystore.path: /usr/share/elasticsearch/config/certs/elastic-certificates.p12
    xpack.security.transport.ssl.truststore.path: /usr/share/elasticsearch/config/certs/elastic-certificates.p12
    xpack.security.http.ssl.enabled: true
    xpack.security.http.ssl.keystore.path: /usr/share/elasticsearch/config/certs/elastic-certificates.p12
- Map secrets into the keystore
keystore:
  - secretName: transport-ssl-keystore-password
  - secretName: transport-ssl-truststore-password
  - secretName: http-ssl-keystore-password
- Supply extra environment varialbes.
extraEnvs:
  - name: "ELASTIC_PASSWORD"
    value: Changeme
Kustomize for Elasticsearch
- Create Kustomize file kustomization.yaml
apiVersion: kustomize.config.k8s.io/v1beta1
kind: Kustomization
resources:
  - all.yaml
  - storageclass.yaml
  - secrets.yaml
- Create storageclass.yaml as referenced above. Below is the example when using AWS EFS as the persistent storage. You can adjust to suit your storage infrastructure.
apiVersion: storage.k8s.io/v1
kind: StorageClass
metadata:
  name: es-ais
provisioner: efs.csi.aws.com
mountOptions:
- tls
parameters:
  provisioningMode: efs-ap
  fileSystemId: YourEFSFileSystemId
  directoryPerms: "1000"
- Create secrets.yaml as referenced. Secrets created are used in the custom values file
apiVersion: v1
data:
  elastic-certificates.p12: CopyAndPasteValueOf-elastic-certificates-base64
kind: Secret
metadata:
  name: elastic-certificates
  namespace: efk
type: Opaque
---
apiVersion: v1
data:
  xpack.security.transport.ssl.keystore.secure_password: CopyAndPasteValueOf-store-password-base64
kind: Secret
metadata:
  name: transport-ssl-keystore-password
  namespace: efk
type: Opaque
---
apiVersion: v1
data:
  xpack.security.transport.ssl.truststore.secure_password: CopyAndPasteValueOf-store-password-base64
kind: Secret
metadata:
  name: transport-ssl-truststore-password
  namespace: efk
type: Opaque
---
apiVersion: v1
data:
  xpack.security.http.ssl.keystore.secure_password: CopyAndPasteValueOf-store-password-base64
kind: Secret
metadata:
  name: http-ssl-keystore-password
  namespace: efk
type: Opaque
Install Elasticsearch Helm chart
Change to where your Kustomize directory for Elasticsearch and run
$ helm upgrade -i -n efk es elastic/elasticsearch -f YourCustomValueDir/elasticsearch.yml --post-renderer ./kustomize
Wait till you will see all elasticsearch pods are in “running” status
$ kubectl get po -n efk -l app=elasticsearch-master
Install Kibana
Kibana enables the visual analysis of data from Elasticsearch indecies. In this guide, we use single instance.
Create Helm custom values file kibana.yaml
- Specify the URL to connect to Elasticsearch. We use the service name and port configured in Elaticsearch
elasticsearchHosts: "https://elasticsearch-master:9200"
- Specify the protocol for Kibana’s readiness check
protocol: https
- Add below kibana.yml configuration file that enables Kinana to talk to Elasticsearch on encrypted connection. For xpack.security.encryptionKey, you can use any text string that is at least 32 characters. Certificates are mounted from the secret resource
kibanaConfig:
  kibana.yml: |
    server.ssl:
      enabled: true
      key: /usr/share/kibana/config/certs/elastic-certificate.pem
      certificate: /usr/share/kibana/config/certs/elastic-certificate.pem
    xpack.security.encryptionKey: Changeme
    elasticsearch.ssl:
      certificateAuthorities: /usr/share/kibana/config/certs/elastic-ca-cert.pem
      verificationMode: certificate
    elasticsearch.hosts: https://elasticsearch-master:9200
- Supply PEM formated Elastic certificate. These certificates will be used in kibana.yml in previous step
secretMounts:
  - name: elastic-certificates-pem
    secretName: elastic-certificates-pem
    path: /usr/share/kibana/config/certs
- Configure extra environment variables to pass to Kibana container on starting up.
extraEnvs:
  - name: "KIBANA_ENCRYPTION_KEY"
    valueFrom:
      secretKeyRef:
        name: kibana
        key: encryptionkey
  - name: "ELASTICSEARCH_USERNAME"
    value: elastic
  - name: "ELASTICSEARCH_PASSWORD"
    value: changeme
- We expose Kibana as the NodePort service.
service:
  type: NodePort
Kustomize for Kibana
- Define Secrets that is used in kibana.yml
apiVersion: v1
data:
  # use base64 format of values of elasticsearch's elastic-certificate.pem and elastic-ca-cert.pem
  elastic-certificate.pem: Changeme
  elastic-ca-cert.pem: Changme
kind: Secret
metadata:
  name: elastic-certificates-pem
  namespace: efk
type: Opaque
---
apiVersion: v1
data:
  # use base64 format of the value you use for xpack.security.encryptionKey
  encryptionkey: Changeme
kind: Secret
metadata:
  name: kibana
  namespace: efk
type: Opaque
- Optional: create an Ingress resource to point to the Kibana serivce
Install/update the Kibana chart
Change to where your Kustomize directory for Kibana and run
$ helm upgrade -i -n efk kibana elastic/kibana -f YourCustomValueDirForKibana/kibana.yml --post-renderer ./kustomize
Wait till you will see the kibana pod is in “running” status
$ kubectl get po -n efk -l app=kibana
Install Fluentd
Create a custom Helm values file fluentd.yaml
- Specify where to output the logs
elasticsearch:
  host: elasticsearch-master
Kustomize for Fluentd
- Create a ConfigMap that includes all Fluentd configuration files as below or you can use your own configuration files.
apiVersion: v1
kind: ConfigMap
metadata:
  name: fluentd-config
data:
  01_sources.conf: |-
    ## logs from podman
    <source>
      @type tail
      @id in_tail_container_logs
      @label @KUBERNETES
      # path /var/log/containers/*.log
      path /var/log/containers/*.log
      pos_file /var/log/fluentd-containers.log.pos
      tag kubernetes.*
      read_from_head true
      <parse>
        @type multi_format
        <pattern>
          format json
          time_key time
          time_type string
          time_format "%Y-%m-%dT%H:%M:%S.%NZ"
          keep_time_key true
        </pattern>
        <pattern>
          format regexp
          expression /^(?<time>.+) (?<stream>stdout|stderr)( (.))? (?<log>.*)$/
          time_format '%Y-%m-%dT%H:%M:%S.%NZ'
          keep_time_key true
        </pattern>
      </parse>
      emit_unmatched_lines true
    </source>
  02_filters.conf: |-
    <label @KUBERNETES>
      <match kubernetes.var.log.containers.fluentd**>
        @type relabel
        @label @FLUENT_LOG
      </match>

      <match kubernetes.var.log.containers.**_kube-system_**>
        @type null
        @id ignore_kube_system_logs
      </match>

      <match kubernetes.var.log.containers.**_efk_**>
        @type null
        @id ignore_efk_stack_logs
      </match>

      <filter kubernetes.**>
        @type kubernetes_metadata
        @id filter_kube_metadata
        skip_labels true
        skip_container_metadata true
        skip_namespace_metadata true
        skip_master_url true
      </filter>

      <match **>
        @type relabel
        @label @DISPATCH
      </match>
    </label>
  03_dispatch.conf: |-
    <label @DISPATCH>
      <filter **>
        @type prometheus
        <metric>
          name fluentd_input_status_num_records_total
          type counter
          desc The total number of incoming records
          <labels>
            tag ${tag}
            hostname ${hostname}
          </labels>
        </metric>
      </filter>

      <match **>
        @type relabel
        @label @OUTPUT
      </match>
    </label>
  04_outputs.conf: |-
    <label @OUTPUT>
      <match kubernetes.**>
        @id detect_exception
        @type detect_exceptions
        remove_tag_prefix kubernetes
        message log
        multiline_flush_interval 3
        max_bytes 500000
        max_lines 1000
      </match>
      <match **>
        @type copy
        <store>
          @type stdout
        </store>
        <store>
          @type elasticsearch
          host "elasticsearch-master"
          port 9200
          path ""
          user elastic
          password Changeme
          index_name ais.${tag}.%Y%m%d
          scheme https
          # set to false for self-signed cert
          ssl_verify false
          # supply El's ca certificat if it's trusted
          # ca_file /tmp/elastic-ca-cert.pem
          ssl_version TLSv1_2
          <buffer tag, time>
            # timekey 3600 # 1 hour time slice
            timekey 60 # 1 min time slice
            timekey_wait 10
          </buffer>
        </store>
      </match>
    </label>
Install/update the Fluentd chart
Change to where your Kustomize directory for Fluentd and run
$ helm upgrade -i -n efk fluentd fluent/fluentd --values YourCustomValueDirForFluentd/fluentd.yml --post-renderer ./kustomize
Fluentd is created using Daemonset which ensure a Fluentd pod is created on each worker node. Wait till you will see the fluentd pods are in “running” status
$ kubectl get po -l app.kubernetes.io/name=fluentd -n efk
3.6 - PostgreSQL Database Tuning
XNAT Database Tuning Settings for PostgreSQL
If XNAT is performing poorly, such as very long delays when adding a Subjects tab, it may be due to the small default Postgres memory configuration.
To change the Postgres memory configuration to better match the available
system memory, add/edit the following settings in
/etc/postgresql/10/opex/postgresql.conf
work_mem = 50MB
maintenance_work_mem = 128MB
effective_cache_size = 256MB
For further information see:
3.7 - Operational recommendations
Requirements and rationals
Collaboration and knowledge share
Tool selection has been chosen with a security oriented focus but enabling collaboration and sharing of site specific configurations, experiences and recommendations.
Security
A layered security approach with mechanisms to provide access at granular levels either through Access Control Lists (ACLs) or encryption
Automated deployment
- Allow use of Continuous Delivery (CD) pipelines
- Incorporate automated testing principals, such as Canary deployments
Federation of service
Tools
- Git - version control
- GnuPG - Encryption key management
- This can be replaced with a corporate Key Management Service (KMS) if your organisation supports this type of service.
- Secrets OPerationS (SOPS)
- Encryption of secrets to allow configuration to be securely placed in version control.
- SOPS allows full file encryption much like many other tools, however, individual values within certain files can be selectively encrypted. This allows the majority of the file that does not pose a site specific security risk to be available for review and sharing amongst Federated support teams. This should also comply with most security team requirements (please ensure this is the case)
- Can utilise GnuPG keys for encryption but also has the ability to incorporate more Corporate type Key Management Services (KMS) and role based groups (such as AWS AIM accounts)
- git-secrets
- Git enhancement that utilises pattern matching to help prevent sensitive information being submitted to version control by accident.
Warning
Does not replace diligence but can help safe guard against mistakes.
- Git enhancement that utilises pattern matching to help prevent sensitive information being submitted to version control by accident.
3.8 -
Operational recommendations
The /docs/_operational folder is a dump directory for any documentation related to the day-to-day runnings of AIS released services. This includes, but is not limited to, operational tasks such as:
- Administration tasks
- Automation
- Release management
- Backup and disaster recovery
Jekyll is used to render these documents and any MarkDown files with the appropriate FrontMatter tags will appear in the Operational drop-down menu item.